Sunday, August 4, 2013

Etching Metal Part 3: DIY Texture Plates

This three part post on etching is in conjunction with my 7/21/13 demo for the Metal Clay Artisan Guild in Connecticut.


Designs...

Etching metal can be used to create jewelry pieces, but it can also be used to create texture plates and stamps for use with metal clays and polymer clays.  Here are three designs for simple stamps using aquatint, marker and PnP resist methods to create the initial design.  Follow the link here to check out the first post on transferring your design to the metal.  If you are using a very precise design or a photograph, focus on the PnP method.  


Etching the Metal...

Once you have transferred your design to the metal, you will need to etch it.  The pieces here are wout the size of half dollars and are etched on 22 gauge copper.  If you follow the link here, you can walk through using ferric chloride to get a "salt etch" in to the metal.  I have had success using this with copper, bronze and nickel silver.


"Printing" your designs in Clay...

The copper pieces in this post are pictured next to the fine silver medallions they created.  I made a pancake of silver clay and rolled it into the copper the same way I would roll onto any other texture plate.  I had lubed each of these up with olive oil as a releasing agent and did not run into any problems with them sticking.  It took a little experimenting to get the clay the right thickness because when I rolled it too thin, the edges of the copper did rip it, but that was easy enough to work out.  This is a great solution to want to produce a limited edition series while still having the ability to make each one unique.  It would be easy enough to change the patina color, add carvings or even dome the shape of the final piece.

Sunday, July 21, 2013

Etching Metal Part 2: The "Salt" Etch


This three part post on etching is in conjunction with my upcoming demo for the Metal Clay Artisan Guild in Connecticut.


The above etched cuff is a great way to start learning to etch.  It was a scrap of copper roofing material that was "sandwiched" in masking tape.  I cut the design out with an exacto knife from the tape and used an aquatinting technique for the resist in the background to create the texture.  If you follow the link here to my last blog post, you can learn all about different resist techniques to get your design on the metal.


As I discussed in my previous post, my etching experiences began a very long time ago with materials like nitric acid and asphaltum.  Today there are much safer etching and resist solutions.  For etching in this post, I am using Ferric Chloride, also known as the "salt" etch.  Ferric Chloride is not an acid, so rather than dissolving the metal, it agitates it and pieces fall out.  Here is some more information from Printmaking Today that discusses the use of Ferric Chloride in the art studio, just follow this link.


Supplies


I use the following materials when etching:
-Saefty Glasses, Rubber Gloves & an Apron
-2 Plastic/Disposable Bowls
-Floral Foam or a Sponge (a disposable object that floats)
-Duct Tape
-Ammonia
-Your prepared Copper
-Ferric Chloride (also known as "PCB Etchant")
Ferric Chloride can be purchased online from a number of jewelry supply companies, but if you can find it locally at a Radio Shack, you will avoid a hazardous shipping fee.  Also, I prefer to purchase chemicals in the smallest quantities necessary until I know how much I am going to use.  This saves me from have a huge stock of a chemical that I need to responsibly dispose of.  Radio Shack sells it for etching motherboards and a pint is around $11.  For jewelry work, a pint will last you quite a while.  Follow this link here to check it out at Radio Shack, if it's not in stock you should be able to select "ship to store" for free. 
     

Safety First!

Ferric Chloride is a salt and not an acid, so you do not have to worry about it being absorbed by the skin.  It also does not give off or produce toxic fumes, so is a great alternative.  With that being said, the rule of thumb for all chemicals is:  Safety Glasses, Apron, Rubber Gloves, Close Toed Shoes and Ventilation!  On a side note, it will stain everything it comes into contact with a dark, sludge green color.  It will take weeks to get it off your skin and nails and it will not come out of clothes or countertops, which is why despite its safety you really want to wear gloves and an apron.  As you pour it and work with it, consider the same precautions you would take with a large bowl of liquid black ink.  The black ink will stain less.

Prepare to Etch


The first time you etch you really need to do a test strip to see how fast your etchant is working and to determine how deep you want the etch to be.  For the discs with the birds on it in this series of posts, I used 22 gauge copper and wanted to find an etch depth that would be deep enough to use as a texture plate in metal clay.  I cut a test strip out of copper the same thickness as the final pieces I was doing.  Coat the back with clear nail polish to protect it.  On the front, using a permanent marker as a resist, draw a border and divide the piece into 4 boxes.  Number each box (1-2-3-4) with the marker as a resist.  You can see my finished test on the right, it has a textured background.  I did 30 minute increments, took the piece out, rinsed it then covered each number/segment with duct tape to protect it from further etching and placed the piece back in the solution.  If I have not etched in a while or I am etching a new project, I always run test strips.  It is a cheap way to ensure I do not ruin a piece, it only takes a few extra minutes to etch all the way through and have a hole in your piece!

To etch the piece, pour the Ferric Chloride solution into a plastic or glass container, 1" should be more than deep enough.  Once an item is used in the studio, it can never go back to the kitchen, so these containers should be marked or disposed of, this is an easy clean up so they can be reused for more etching in the future.  Keep it small - the container only needs to be slightly larger than what you are etching.  Cut a piece of floral foam or a sponge a little bigger than your piece.  Wrap a piece of duct tape around the foam with the sticky side OUT.  Wrap another piece around three of the four sides to cover the sticky sides so you can handle it.  Use rubber gloves to place your piece with its back pressed firmly into the sticky tape.  Remember, at this point the oils from your fingers could ruin your design.  Then place the piece in the container and give it a press.  It should bounce back and gently float around.  Since the salt agitates, but does not dissolve the metal, it is a good idea to tap it or gently agitate it while it is etching to make sure the pieces are falling out and giving a clean etch.  While your piece is etching, get a bucket of water to rinse it in and have it partly filled next to your solution.

Final Etch


When the time is up, based on your test strips, pull the piece out and rinse it in the water bucket.  Next take a clean sponge with some Ammonia on it and rub the piece to stop the etch from continuing.  Pull the pieces off the foam.  The pieces may need to be clean with acetone (or nail polish remover) to get the rest of the resist off.  You can see here that the etched piece has a "starburst" effect in the background.  Since the metal is not being dissolved, large areas are often left with this effect.  The best way to control a large open area is with the aquatint resist technique.   I find that Ferric Chloride solution has about 5 hours of etching time for me, which equates to 2-3 times of use.  I also use it all at the same time, so I might etch some pieces, cover the solution and then be sure to either use it or dispose of it within a week.  After that, you just don't know if you will get the same results from it and I don't think it's worth the risk of ruining a piece with potentially spent etchant.  I have successfully used ferric chloride from the same original bottle for years, so it does have a long shelf life until activated.  Check out the final blog post in this series to see how these copper discs can be used as texture plates.


Disposal

The Ferric Chloride should be neutralized with baking powder.  Allow any solids to settle and drain off any neutralized liquid into your rinse bucket so that it is diluted and flush down the toilet.  The remaining solids or sludge should be poured into a plastic sealable container, clearly labeled, and disposed of at your local hazardous waste disposal facility.


Sunday, July 7, 2013

Etching Metal Part 1: The Resist


This three part post on etching is in conjunction with my upcoming demo for the Metal Clay Artisan Guild in Connecticut.


I have been working in metal for almost two decades and it all began with etching.  During a printmaking class in high school I learned to etch zinc plates with Nitric Acid for intaglio printing and fell more in love with the surface qualities I could create in the metal than the final prints.  I have used these basic techniques for years in my own work and in my classroom.  From printmaking, to sculpture to jewelry, the technique is relatively the same, it just varies in size- also, today I have found safer materials to work with than nitric acid and asphaltum.  The information in these next two posts is what I use to successfully etch copper, nickel and brass metals.


1.  Prep Your Designs & Your Metal

Start by figuring out what you will eventually use the piece for.  Will it be the actual piece of jewelry? Maybe it will be a stamp for polymer work? Maybe it will be a plate for embossing paper?  Or maybe it could even be a texture plate for metal clay?  In any case, you want to determine your size and draw or print the original artwork or copyright-free image you are using the exact size and shape you will eventually etch.  The cleaner and sharper your image is, the better it will work in the end.

Prep your metal by first cutting it to a size slightly larger than the design you want to etch, it also must be flat.  Next, clean it with a super fine steel wool pad to remove any oils that might disrupt the resist or the etch.  After this point, be careful not to touch it with your fingers, only hold it by the edge.  Immediately before you apply any of the below resists, wipe the piece down with rubbing alcohol.

2.  Create Your Resist

You will need to create a "resist" on the surface of the metal to protect the part of your design you would like to keep raised.  The etching process removes the metal that is left exposed.  You can etch sharp clean lines or large backgrounds can be removed.  This needs to be decided during your design.   There are many ways to create a resist on the metal, here are three simple and safe materials to use as resists.

PnP Resist (Press-n-Peel blue acetate film)

If you have a very precise image or are trying to transfer a photograph, one of the best ways to get your image on the copper is using PnP paper.  You can photocopy your image to the matte side of the PnP paper using a copy machine with a carbon based toner.  In my experience, printer ink does not generally create a successful resist.  You will then iron it on to the metal with the matte side facing down to create a resist, as you iron and the image becomes more and more visible through the acetate, the resist is transferring.  When the metal has cooled, pull up a corner of the PnP to check your design, if you need to you can lay it back down and keep ironing.  If there are small areas that need to be touched up, you can fill them in with black permanent marker or nail polish.  You will need to protect the back of your design with contact paper or electrical tape and then seal the edges with nail polish to prevent them from being etched.

There is a great article on PnP you can find on the Ganoskin Project site that you can follow a link to here.


Tips for PnP Resist:
-Run the copy machine until you can get the darkest (and cleanest) copy possible on white paper before copying on the matte side of the acetate.
-Be prepared to test your iron on scrap metal.  Since every iron is different, you will need to have some extra PnP and scrap metal to do test strips.  My iron at home requires the highest setting for almost 10 mins to get the small size transfers in this post, the iron in my classroom requires a lower setting and less time.  Begin on your highest setting and move the iron in circles until the image becomes clearly visible or the acetate buckles.  If it buckles, turn the iron down.  Hold the acetate with tweezers down in one corner and peel up with another pair of tweezers from another corner to check transfer.  Continue ironing as needed.  I generally time my test strips in 3 minute increments.


Tape Resist 

Using either masking tape or clear plastic packing tape, make a "tape sandwich" with your metal in the middle.  Make sure to seal all the way around the edge, this will stay in place during the etch to protect the back and sides.  Rub the tape down to remove any air bubbles. Then either draw or tape your design on top of the tape, leaving a border of tape to protect the edge.  You will then use an exacto knife to cut out your design.  In this case, I am cutting the design and removing it in order to etch the lines of the designs.  The tape will be left on the background area to protect it.

Permanent Marker Resist 

Choose a high quality permanent marker and draw your design directly on the clean metal.  Make sure it is a rich, solid black with no transparent areas.  Make sure there is a border to protect your edge and seal your back with either electrical tape or nail polish.

Aquatint Texture Resist

The same technique used to etch printmaking intaglio plates to create a stippling effect is great to create a texture background to hold a patina.  You can either use it to create a simple texture piece or in the background of any of the above resist methods.  Simply spray a mist of spray paint LIGHTLY across the back of the piece of metal in a quick sweeping motion.  This should leave "dots" randomly across the surface.  Experiment with the density of the spray and the effect you get from the etching, this is another time you will need to do test strips to get your desired effect.  Here, I drew an image with permanent marker and "swept" it with spray paint to create the dots in the background which will be our texture later on.  You can see how light it is, the darker it gets, the more you are blocking out the etch.  Don't forget to protect your edges and your back.


If you want to learn more about etching methods in printmaking, check out the great site artist Julie Niskanen has on intaglio process by clicking here.

3.  Etching the Metal

Once you have prepped and applied your resist to the metal, visit my next blog post (here) to learn how to complete the etching process.


Same Technique, Different Sizes...


All of these pieces were done using the etched copper method in this blog post.  These were all specifically done using a masking tape resist, as described above.  From the 6' long hanging sculpture (right) to the 14" x 18" framed etching (left) to the chunky cuff bracelet (above), the same method has endless possibilities.


Sunday, June 16, 2013

Repoussé Effects in Metal Clay


Repoussé is a traditional metalworking technique where a raised or relief surface is created on the front of the metal by hammering a design from the back of the metal.  It is a french term whose origins mean to push from behind.  It is often used along with another traditional technique called "chasing" where the design is then sharpened or refined from the front by sinking in the metal on that side.  The effect of repoussé and chasing creates what is often referred to as embossing.  You are dealing with the elastic qualities of a malleable metal, so there is no actual loss of metal. 


This is a relatively simple technique to replicate in metal clay while the material is in its clay state.  It is a great way to incorporate original designs and textures, even for the beginner artist.  You will need something to create your impression with, the pieces in this post were done using scratch foam, so that is the process I will focus on here.   Scratch foam is a popular and economic material used in basic printmaking.  If you think it is an elementary school material, check out the sophisticated prints by artist Annette Mitchell who is able to get woodcut-like imagery from recycled meat trays.  If you can not find it at a local craft store, you can always use cleaned foam trays from the supermarket.  Just cut yourself a square to work with.


Begin by working out a simple design.  I did a series of pieces based on swirling cloud patterns, they all began with the same frame, but I played with the interior a little differently on each piece.  I like working out designs like this on tracing paper so that I can quickly replicate elements I am happy with.  I then tape the tracing paper to a piece of scratch foam and lightly go over it with a ball point pen, just enough to get a slight indent in the surface.  I then use an embossing tool to go over the lines, but maintain medium to light pressure.  Each time the lines will become more pronounced, but I don't end up ripping or wrinkling the foam.  As the lines get deeper, I change the gauge of the embossing tool if I want thicker lines.  The key is patience until you get a feel for the right pressure on the foam.  If you are looking simply to create texture sheets to emboss with, you can use anything you can dent the surface with from a comb to a meat tenderizer.  Keep in mind the scratch foam has a more "smooth" side and a more "rough" side, you will need to look closely at the foam to discern this, I recommend carving into the smooth side.  In any case, the surface of the clay will pick up the surface of the foam, which is more subtle on one side than the other.  


Once the design is carved in the foam, I lube the foam so the clay will eventually release.  I set my rolling slats (or cards) on top of the foam on either side of the design a little thicker than I want the piece to account for the raised areas.  If the piece of foam is too small to support the width of the slats, I lay additional slats (or cards) next to the foam to keep them even.  I then roll my clay into the design the same way I would roll it onto any other texture plate.  I then gently pull it off and trim the excess.  Once dry, they are fired and finished the same as any other piece.  The bonus of the scratch foam is that it is relatively inexpensive and fairly forgiving.

A few tips about scratch foam... 
If you chose the wrong side and this impacts your design (which you will be able to see as soon as you pull it off) simply smooth  your metal clay piece with a damp sponge - as long as you are light with your pressure it will clean up the surface without removing the embossing.   Also, remember this is a printmaking process - you are essentially creating a "stamp" that you are embossing your piece with so your design must be the REVERSE of what you plan.  In a symmetrical design this does not matter, but in the design of a piece like I did here it can make a difference.  I planned it backwards because I have done this enough times to think about it that way.  If you are not quite there yet, this is another good reason to workout designs on tracing paper, because you can then lay them on the foam on either side.  If you draw your design exactly the way you want it, you should then lay the tracing paper face down on the foam.  It will reverse the design on the foam and come out the way you intend in the clay.  Since it's tracing paper, you can see through it and can still easily trace it.


Sunday, June 2, 2013

FastFire BRONZclay Success!


After feeling a bit "burned" by base metal clays a few months ago, I went ahead and tried a new brand on the recommendation of jewelry artist Evelyn Pelati.  I went with FastFire BRONZclay by Metal Adventure and was happy with the results for a variety of reasons.  Here are a few...

To begin with the obvious, it fires fast.  It takes an hour to ramp and an hour to fire.  It is a one phase fire, so set the kiln and forget it.  I was looking for a base metal clay to use with multiple classes, so I do not always have the luxury of being able to run a multi-phase firing during my teaching schedule.  This allows me to not have to return to run a firing on my own time. 

There is the other obvious of the price, with bronze clays being around 30 cents a gram and silver clays being more than $2 a gram, it is the most economical, especially for introducing it to a large class.

The firing directions are clear and easy, particularly if this is your first attempt at base metal clays.  The descriptions of what you will find out of the kiln and what that means for your firing temperatures are also clear.  I was able to figure out my firing schedule after just two test fires, though I have had to make adjustments based on running a whole class worth of pieces at a time.

I have also been able to successfully fire in a ceramic firing vessel.  Since I am flip-flopping between silver and bronze, depending on the class, I am running multiple firings a day.  When you fire in a steel pan there is a black flake sort of fire scale that needs to be vacuumed from the kiln after your firings.  With a ceramic vessel, there is no evidence of the base metal firing.

Last, the workability of the clay has been great.  It has a silky flexibility that makes it great for draping and forgiving for students just learning to work with it.  When it dries, it is easy to reconstitute and continue working.

These were a couple of quick test pieces where the clay was rolled into scratch foam designs and run through the firing.  The bronze has a warm gold hue and nice weight once fully sintered.  


Sunday, May 19, 2013

Carving in Metal Clay


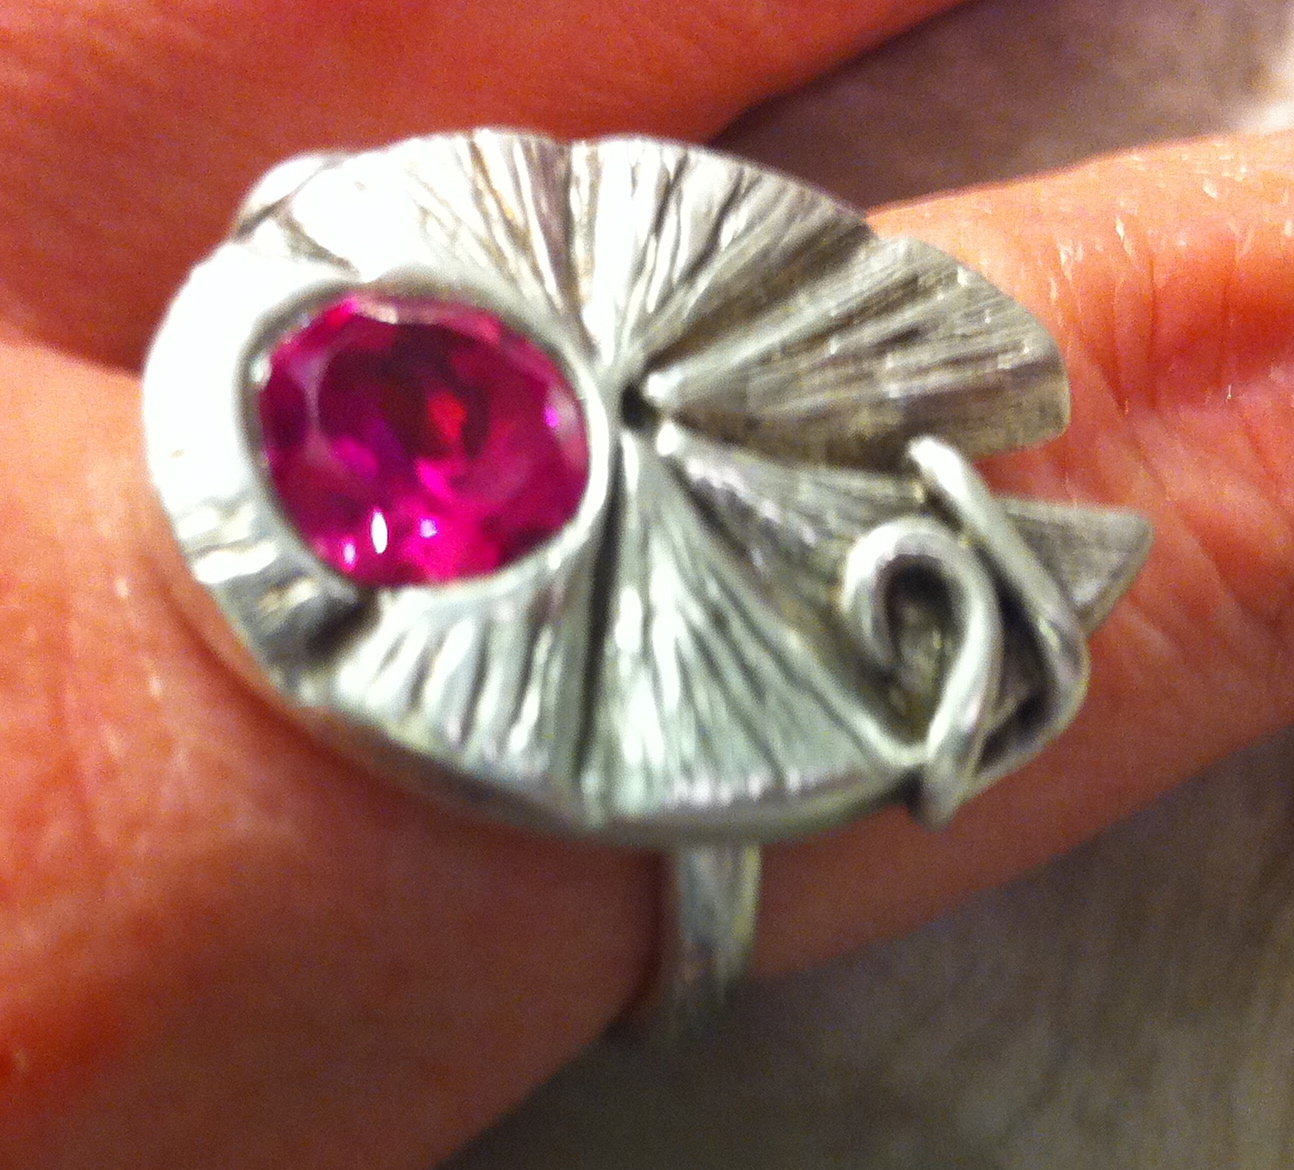
This week's challenge was to translate a carved design into the top of a ring.  I was inspired by this bright pink 8mm CZ and couldn't resist the temptation to nestle it safely into a lily pad.  The perfect pink floral accent to the top of this piece.  I balled up my clay and squished it into a flat pancake the same height as the CZ.  I poked a hole with a straw and sank the CZ in until the top of the clay surrounded it.  I then cut out my initial shape of the lily pad and let it dry.  Once bone dry, the clay is very easy to carve, especially at this thickness.  I find that small diamond files are the best carving tools in this dry material.  It has a similar feel to plaster carving.  I began with my general design and deeper lines and then carved the more detailed texture, each time lightly scratching or "drawing" in my design before begining to file.  The secret is no pressure.  The tools are sharp and just need to be trusted to do their job.  I added a coil to keep the eye moving around the piece and finished the ring with a liver of sulfur patina to bring out the richness of the texture.

Sunday, May 5, 2013

On the Road...

Taking the studio on the road this week, I found myself surrounded by some great local artisans at Get Baked Bakery in Windsor Center.  It was a delicious celebration of Art and Spring!  Thanks to all the familiar faces who braved the beautiful weather to stop by and say hi :-)  Looking forward to showing with all these fine artists again!