Showing posts with label Silver Magpie Studio. Show all posts

Sunday, July 7, 2013

Etching Metal Part 1: The Resist


This three part post on etching is in conjunction with my upcoming demo for the Metal Clay Artisan Guild in Connecticut.


I have been working in metal for almost two decades and it all began with etching.  During a printmaking class in high school I learned to etch zinc plates with Nitric Acid for intaglio printing and fell more in love with the surface qualities I could create in the metal than the final prints.  I have used these basic techniques for years in my own work and in my classroom.  From printmaking, to sculpture to jewelry, the technique is relatively the same, it just varies in size- also, today I have found safer materials to work with than nitric acid and asphaltum.  The information in these next two posts is what I use to successfully etch copper, nickel and brass metals.


1.  Prep Your Designs & Your Metal

Start by figuring out what you will eventually use the piece for.  Will it be the actual piece of jewelry? Maybe it will be a stamp for polymer work? Maybe it will be a plate for embossing paper?  Or maybe it could even be a texture plate for metal clay?  In any case, you want to determine your size and draw or print the original artwork or copyright-free image you are using the exact size and shape you will eventually etch.  The cleaner and sharper your image is, the better it will work in the end.

Prep your metal by first cutting it to a size slightly larger than the design you want to etch, it also must be flat.  Next, clean it with a super fine steel wool pad to remove any oils that might disrupt the resist or the etch.  After this point, be careful not to touch it with your fingers, only hold it by the edge.  Immediately before you apply any of the below resists, wipe the piece down with rubbing alcohol.

2.  Create Your Resist

You will need to create a "resist" on the surface of the metal to protect the part of your design you would like to keep raised.  The etching process removes the metal that is left exposed.  You can etch sharp clean lines or large backgrounds can be removed.  This needs to be decided during your design.   There are many ways to create a resist on the metal, here are three simple and safe materials to use as resists.

PnP Resist (Press-n-Peel blue acetate film)

If you have a very precise image or are trying to transfer a photograph, one of the best ways to get your image on the copper is using PnP paper.  You can photocopy your image to the matte side of the PnP paper using a copy machine with a carbon based toner.  In my experience, printer ink does not generally create a successful resist.  You will then iron it on to the metal with the matte side facing down to create a resist, as you iron and the image becomes more and more visible through the acetate, the resist is transferring.  When the metal has cooled, pull up a corner of the PnP to check your design, if you need to you can lay it back down and keep ironing.  If there are small areas that need to be touched up, you can fill them in with black permanent marker or nail polish.  You will need to protect the back of your design with contact paper or electrical tape and then seal the edges with nail polish to prevent them from being etched.

There is a great article on PnP you can find on the Ganoskin Project site that you can follow a link to here.


Tips for PnP Resist:
-Run the copy machine until you can get the darkest (and cleanest) copy possible on white paper before copying on the matte side of the acetate.
-Be prepared to test your iron on scrap metal.  Since every iron is different, you will need to have some extra PnP and scrap metal to do test strips.  My iron at home requires the highest setting for almost 10 mins to get the small size transfers in this post, the iron in my classroom requires a lower setting and less time.  Begin on your highest setting and move the iron in circles until the image becomes clearly visible or the acetate buckles.  If it buckles, turn the iron down.  Hold the acetate with tweezers down in one corner and peel up with another pair of tweezers from another corner to check transfer.  Continue ironing as needed.  I generally time my test strips in 3 minute increments.


Tape Resist 

Using either masking tape or clear plastic packing tape, make a "tape sandwich" with your metal in the middle.  Make sure to seal all the way around the edge, this will stay in place during the etch to protect the back and sides.  Rub the tape down to remove any air bubbles. Then either draw or tape your design on top of the tape, leaving a border of tape to protect the edge.  You will then use an exacto knife to cut out your design.  In this case, I am cutting the design and removing it in order to etch the lines of the designs.  The tape will be left on the background area to protect it.

Permanent Marker Resist 

Choose a high quality permanent marker and draw your design directly on the clean metal.  Make sure it is a rich, solid black with no transparent areas.  Make sure there is a border to protect your edge and seal your back with either electrical tape or nail polish.

Aquatint Texture Resist

The same technique used to etch printmaking intaglio plates to create a stippling effect is great to create a texture background to hold a patina.  You can either use it to create a simple texture piece or in the background of any of the above resist methods.  Simply spray a mist of spray paint LIGHTLY across the back of the piece of metal in a quick sweeping motion.  This should leave "dots" randomly across the surface.  Experiment with the density of the spray and the effect you get from the etching, this is another time you will need to do test strips to get your desired effect.  Here, I drew an image with permanent marker and "swept" it with spray paint to create the dots in the background which will be our texture later on.  You can see how light it is, the darker it gets, the more you are blocking out the etch.  Don't forget to protect your edges and your back.


If you want to learn more about etching methods in printmaking, check out the great site artist Julie Niskanen has on intaglio process by clicking here.

3.  Etching the Metal

Once you have prepped and applied your resist to the metal, visit my next blog post (here) to learn how to complete the etching process.


Same Technique, Different Sizes...


All of these pieces were done using the etched copper method in this blog post.  These were all specifically done using a masking tape resist, as described above.  From the 6' long hanging sculpture (right) to the 14" x 18" framed etching (left) to the chunky cuff bracelet (above), the same method has endless possibilities.


Sunday, June 16, 2013

Repoussé Effects in Metal Clay


Repoussé is a traditional metalworking technique where a raised or relief surface is created on the front of the metal by hammering a design from the back of the metal.  It is a french term whose origins mean to push from behind.  It is often used along with another traditional technique called "chasing" where the design is then sharpened or refined from the front by sinking in the metal on that side.  The effect of repoussé and chasing creates what is often referred to as embossing.  You are dealing with the elastic qualities of a malleable metal, so there is no actual loss of metal. 


This is a relatively simple technique to replicate in metal clay while the material is in its clay state.  It is a great way to incorporate original designs and textures, even for the beginner artist.  You will need something to create your impression with, the pieces in this post were done using scratch foam, so that is the process I will focus on here.   Scratch foam is a popular and economic material used in basic printmaking.  If you think it is an elementary school material, check out the sophisticated prints by artist Annette Mitchell who is able to get woodcut-like imagery from recycled meat trays.  If you can not find it at a local craft store, you can always use cleaned foam trays from the supermarket.  Just cut yourself a square to work with.


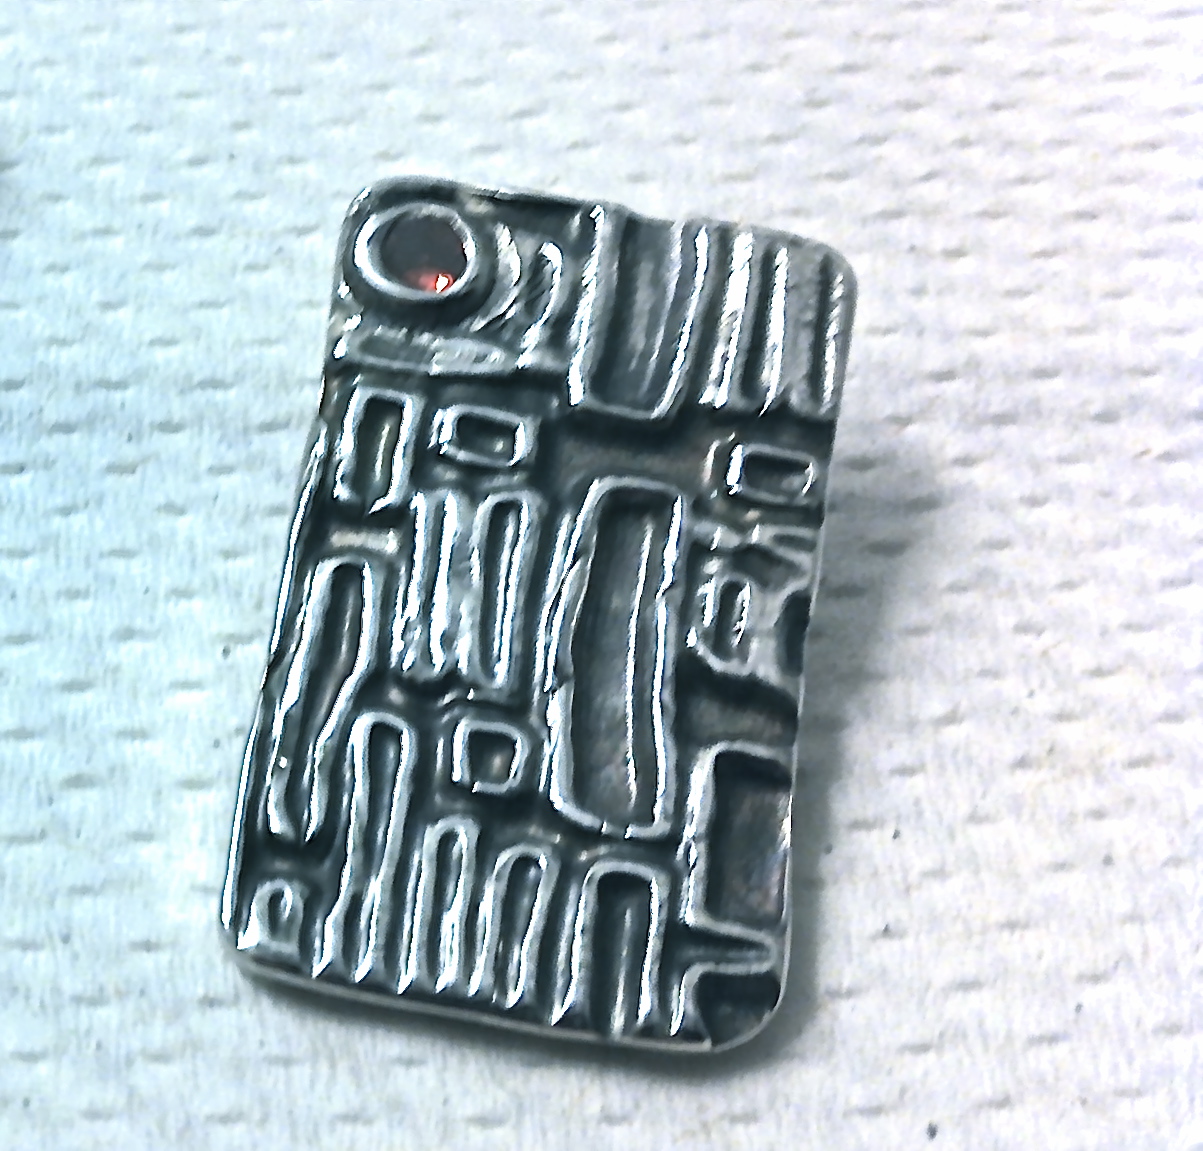
Begin by working out a simple design.  I did a series of pieces based on swirling cloud patterns, they all began with the same frame, but I played with the interior a little differently on each piece.  I like working out designs like this on tracing paper so that I can quickly replicate elements I am happy with.  I then tape the tracing paper to a piece of scratch foam and lightly go over it with a ball point pen, just enough to get a slight indent in the surface.  I then use an embossing tool to go over the lines, but maintain medium to light pressure.  Each time the lines will become more pronounced, but I don't end up ripping or wrinkling the foam.  As the lines get deeper, I change the gauge of the embossing tool if I want thicker lines.  The key is patience until you get a feel for the right pressure on the foam.  If you are looking simply to create texture sheets to emboss with, you can use anything you can dent the surface with from a comb to a meat tenderizer.  Keep in mind the scratch foam has a more "smooth" side and a more "rough" side, you will need to look closely at the foam to discern this, I recommend carving into the smooth side.  In any case, the surface of the clay will pick up the surface of the foam, which is more subtle on one side than the other.  


Once the design is carved in the foam, I lube the foam so the clay will eventually release.  I set my rolling slats (or cards) on top of the foam on either side of the design a little thicker than I want the piece to account for the raised areas.  If the piece of foam is too small to support the width of the slats, I lay additional slats (or cards) next to the foam to keep them even.  I then roll my clay into the design the same way I would roll it onto any other texture plate.  I then gently pull it off and trim the excess.  Once dry, they are fired and finished the same as any other piece.  The bonus of the scratch foam is that it is relatively inexpensive and fairly forgiving.

A few tips about scratch foam... 
If you chose the wrong side and this impacts your design (which you will be able to see as soon as you pull it off) simply smooth  your metal clay piece with a damp sponge - as long as you are light with your pressure it will clean up the surface without removing the embossing.   Also, remember this is a printmaking process - you are essentially creating a "stamp" that you are embossing your piece with so your design must be the REVERSE of what you plan.  In a symmetrical design this does not matter, but in the design of a piece like I did here it can make a difference.  I planned it backwards because I have done this enough times to think about it that way.  If you are not quite there yet, this is another good reason to workout designs on tracing paper, because you can then lay them on the foam on either side.  If you draw your design exactly the way you want it, you should then lay the tracing paper face down on the foam.  It will reverse the design on the foam and come out the way you intend in the clay.  Since it's tracing paper, you can see through it and can still easily trace it.


Sunday, June 2, 2013

FastFire BRONZclay Success!


After feeling a bit "burned" by base metal clays a few months ago, I went ahead and tried a new brand on the recommendation of jewelry artist Evelyn Pelati.  I went with FastFire BRONZclay by Metal Adventure and was happy with the results for a variety of reasons.  Here are a few...

To begin with the obvious, it fires fast.  It takes an hour to ramp and an hour to fire.  It is a one phase fire, so set the kiln and forget it.  I was looking for a base metal clay to use with multiple classes, so I do not always have the luxury of being able to run a multi-phase firing during my teaching schedule.  This allows me to not have to return to run a firing on my own time. 

There is the other obvious of the price, with bronze clays being around 30 cents a gram and silver clays being more than $2 a gram, it is the most economical, especially for introducing it to a large class.

The firing directions are clear and easy, particularly if this is your first attempt at base metal clays.  The descriptions of what you will find out of the kiln and what that means for your firing temperatures are also clear.  I was able to figure out my firing schedule after just two test fires, though I have had to make adjustments based on running a whole class worth of pieces at a time.

I have also been able to successfully fire in a ceramic firing vessel.  Since I am flip-flopping between silver and bronze, depending on the class, I am running multiple firings a day.  When you fire in a steel pan there is a black flake sort of fire scale that needs to be vacuumed from the kiln after your firings.  With a ceramic vessel, there is no evidence of the base metal firing.

Last, the workability of the clay has been great.  It has a silky flexibility that makes it great for draping and forgiving for students just learning to work with it.  When it dries, it is easy to reconstitute and continue working.

These were a couple of quick test pieces where the clay was rolled into scratch foam designs and run through the firing.  The bronze has a warm gold hue and nice weight once fully sintered.  


Sunday, May 19, 2013

Carving in Metal Clay


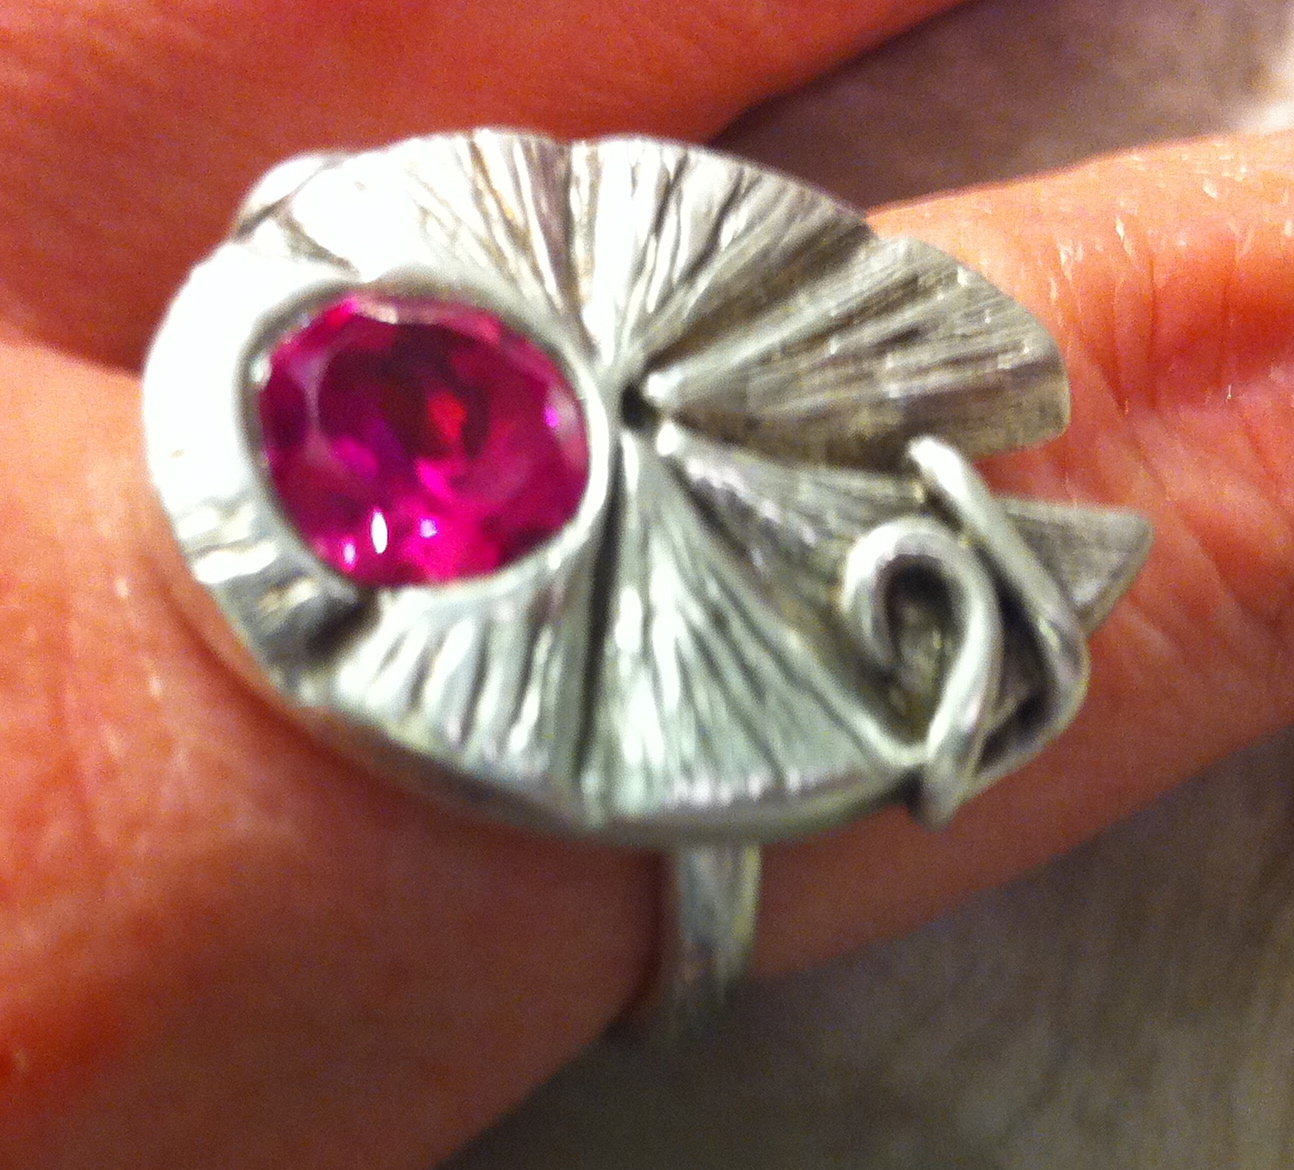
This week's challenge was to translate a carved design into the top of a ring.  I was inspired by this bright pink 8mm CZ and couldn't resist the temptation to nestle it safely into a lily pad.  The perfect pink floral accent to the top of this piece.  I balled up my clay and squished it into a flat pancake the same height as the CZ.  I poked a hole with a straw and sank the CZ in until the top of the clay surrounded it.  I then cut out my initial shape of the lily pad and let it dry.  Once bone dry, the clay is very easy to carve, especially at this thickness.  I find that small diamond files are the best carving tools in this dry material.  It has a similar feel to plaster carving.  I began with my general design and deeper lines and then carved the more detailed texture, each time lightly scratching or "drawing" in my design before begining to file.  The secret is no pressure.  The tools are sharp and just need to be trusted to do their job.  I added a coil to keep the eye moving around the piece and finished the ring with a liver of sulfur patina to bring out the richness of the texture.

Sunday, May 5, 2013

On the Road...

Taking the studio on the road this week, I found myself surrounded by some great local artisans at Get Baked Bakery in Windsor Center.  It was a delicious celebration of Art and Spring!  Thanks to all the familiar faces who braved the beautiful weather to stop by and say hi :-)  Looking forward to showing with all these fine artists again!

Sunday, April 21, 2013

Tool Tip: Stone Setting Trick


Setting tiny stones can be frustrating at times.  There are great shaped tweezers for picking up pearls or or other larger shaped pieces, but what about a small stone?  I recently saw that companies are now selling "Stone Pickers" to help with this, which is a great solution, but one you really can do for yourself without the extra charge.  Any pointed tool, from a pin tool to a dental tool, with a small ball of wax or even poster putty on the end creates the sticky finger you need to place the stone.  If you are having trouble with it rolling off the tip when you have it in place, a pin tool in the other hand can give it a gentle push into place.


Sunday, March 24, 2013

Liver of Sulfur Patina


That great antiqued look that really gives textured metal a sense of depth often comes from a simple (and super quick) patina of Liver of Sulfur.  Liver of Sulfur comes in dry lump form and gel form.  The dry lump form has a shorter shelf life, impacted by light and moisture, though kept in light proof and dry conditions I have had no problem with it working long term.  Below are images of my use of Liver of Sulfur to patina some recent pieces, obviously you should follow the directions that come with the brand you purchase, but you can get an idea of the process and results from the below post.


I tend to use glass bowls when working with different chemicals in order to reduce the potential for reaction and ensure they are able to be cleaned when done.  Remember, once something has been used in the art studio, it should never go back to the kitchen for food use. Liver of Sulfur should be used in a well ventilated area because it stinks (like sulfur).  Either your Liver of Sulfur solution or the metal should be hot in order to improve the reaction.  Depending on how strong you mix the solution, metal in the general area (like rings on the hand mixing the solution) can react to it in the air, so consider removing your own jewelry before you begin.  

I dissolved a small lump (a very small pea-sized piece) of Liver of Sulfur in about a cup of very hot (not boiling) water in a glass dish.  In the dish next to it I had cold water and Baking Soda to serve as a stop-bath.  I ran yarn through the bails to keep my fingers clean, dropped each piece in, it only takes seconds to get a rich black, pulled them out and dropped them in the stop-bath.  Liver of Sulfur has a wonderful range of iridescent blue to deepest black, so if you watch it close you can pull the piece out and stop the reaction at the exact color you are looking for.  After a quick dip in the stop-bath, they are rinsed, dried and ready to be finished.


Above, you can see that the pieces have a rich black patina, so it is time to start bringing back the highlights to show all the depth in the texture.  I prefer to use very fine steel wool to buff the raised areas of the piece.  Below you can see a finished piece with more defined texture and antiqued look.  Remember to follow the recommendations on the package for disposal of Liver of Sulfur solution once you are finished with it.  The best part is that if you are unhappy with it, you can toss the piece back in the tumbler (or go at it with any variety of buffing/sanding tools) and strip the patina off to start again.


Sunday, March 10, 2013

Barrel Bails


I recently spent some time playing with designs for barrel shaped bails that would sit behind and on top of small geometric pendants I had been creating.  They were all part of a small series that I wanted to keep unified, so I needed a versatile design that would fit the varying shapes, while staying visually cohesive.  For these pieces, I began by rolling out a sheet of metal clay 3 cards thick.  I cut it into a long rectangle, wrapped it around a straw I had rubbed with olive oil and sealed it's seam.  I let it stiffen up for just a few minutes before beginning to slice it on the straw.  I held my knife in place and rolled the straw to get an even cut.  I then spaced out each of the pieces and set them to dry in place on the straw.  Once they were bone dry, I gently slid them off and sanded them before attaching them to my dried pendants with slip.  Starting with the longer piece and cutting it apart allowed me to make several pieces at once and vary their sizes to fit the individual pendants they would be attached to.  It was important to cut them on the straw in order for the clay to stay supported and not collapse under the pressure of the knife due to its hollow center.

Sunday, February 24, 2013

Whimsical Tree Mural


This week the studio went mobile as I traveled to do a very special mural for a very special little girl.  Working with her parents, we developed a whimsical tree with floating pink leaves to adorn her walls.  This sort of project is not nearly as intimidating as it may seem.  Decal Murals are pretty popular today, but also pricey.  The cost of paint for this project was under $25 and it was completed in one day.  Below you can see the stages of the mural's development.  You can see I started with a simple pencil sketch right on the wall, if you are not comfortable free-handing your image, project it on the wall and trace it.   


Keep the image and the color simple.  The tree trunk is done as a silhouette in brown, this was a huge time saver since I had only one day to complete this piece from start to finish.  I am using latex wall paint for the large brown area and Martha Stewart Pearl Accents Craft Paint for the leaves (the pearl paint has a really lovely shine as it picks up the light).  The larger leaves were done from stencils I cut from manilla folders and dry brushed multiple colors on at the same time.  There was a plan for the larger leaves and then it became more intuitive as I played with where the smaller leaves would float around the closet.  To fill in the rest (and save hours of time), I cut a medium and small leaf out of a sponge (just using scissors) and simply stamped them on the wall.  The finishing touch can be seen in the image on the below right, as that special little girl got put to work and left her own marks among the leaves.


Sunday, February 3, 2013

Frosty Patina


This dome shaped piece was developed as part of my series of reflective pendants inspired by the ocean. Finished on a cold January evening as the east coast plummeted into a deep freeze, the frosty patina on its surface is reminiscent of the wintery afternoons I have spent watching the waves crash on the Narragansett beach with my mother. To achieve this frosty, swirling patina I began with black alcohol ink and mixed a few drops of snowcap white alcohol ink binder.  This creates a dark bluish ink that is thick and dries very quickly.  I painted it on and let it dry, but was unhappy with how dark the patina came out.  I dropped the piece in a cup of rubbing alcohol to remove the color and it began to lift off in layers.  This was a very different effect than I have seen in the past when removing this ink and assume it is due to mixing it with the binder.  When it reached this particular shade of ice blue with some dark areas creating depth in its crevices, I pulled it out and stopped the reaction.  I'm excited about the potential this process has in creating varied layers of value with the inks and will be experimenting with other colors in combination with the binder.

Sunday, January 20, 2013

Metal Leaf Case


Recently, a friend was frustrated by not being able to find a small business card holder that didn't take up as much room as her wallet.  Knowing she is an antique lover, I saw a lot of potential in an old cigarette case.  The metal was dinged and scratched, so I thought some of the same techniques that add color to a jewelry surface, might add some interest to the case.  I began by sponging on alcohol inks in blue and purple on the interior of the case.  It dried quickly and I then coated it with metal leaf adhesive.  This adhesive tends to go on milky white and is ready for the leaf when it is clear (which can be any where from 15 minutes to and hour depending on the brand).  I was using a packet of variegated leaf, laying it on gently with tweezers, I then brushed it in a circular pattern which moved the excess flakes around and created a speckled effect on the edges.  I repeated this on the front of the case around the edges and along the center.  When I was happy with the leafing I was left with a bit of a sticky mess on the hinges and the edges of the piece where I left the metal leaf speckled, instead of fully covered.  The metal leaf adhesive never fully dries and leaves a sticky residue.  Using a q-tip dipped in lighter fluid, I was able to clean off the adhesive, be careful since this can also remove the alcohol ink.  Once dry, I went back over the surface with a soft brush until all the leaf was smoothly blended.  I left the piece to dry overnight before finally sealing it with Minwax Polycrylic  water-based sealer.  This case is going to be handled a lot and I've had a lot of luck with this drying clear and leaving a nice protective shell, there are specific metal leaf sealers or something like modge podge will work, as well.  The final results can be seen at the top of this post.  It turned out to be a  great little repurposing project.

Sunday, December 23, 2012

Alcohol Ink Patina on Metal Clay


As I got to the finishing stages of this series, I knew I wanted to really bring the texture out and that the best way to do that was with a patina.   Liver of Sulfur is a traditional way to get a variety of tones, but requires precise timing for colors beyond black and a strong stomach as it does stink up the immediate area.  In looking for another option, I began experimenting with alcohol ink on the recommendation of a friend and have really been happy with the results.  Alcohol inks are sold in the scrapbooking section of most craft stores.  They are a solvent based ink and work great on non-porous surfaces, from metal to glass to super glossy paper and they come in dozens of colors.  I wanted to antique this piece with turquoise tones to really draw on its references to the ocean.  I took my fired and polished pendant and just touched the tip of the ink bottle to the surface and let the ink run through the crevices of the texture.  It only takes a few moments to dry and then I start buffing it off with a super fine piece of steel wool.  I also like to dab a little on my maker's mark on the back to pronounce it a little more.  I clean up edges and brushes (if I use them) with rubbing alcohol.  Remember to protect anything you don't want to be stained by this ink, such as findings or stones.  Since I am using the ink as a patina that sits down inside the texture and all the ink has been removed from the surface, I do not seal it because it is no more likely to rub off than a liver of sulfur or other such patina.  


Sunday, December 16, 2012

Tumble & Shine


Once I resolved the bails on this small series of simple pendants, it was time to fire and tumble them.  When silver clay is fired it does not come out looking shiny and metallic.  When I first tried metal clay I thought I was under-firing it because it kept coming out white.  Now I know that white is simply the fire-scale on the surface of the metal (below left).  It easily comes off with a brass brush, but leaves the silver sort of matte and in need of polishing.  A tumbler is a great way to polish up your pieces (not just metal clay) and it serves to help work-harden your pieces.  It also softens burrs that might be on your metal.  Tumblers range in price, I use the small inexpensive one above and can fit a number of pieces into it.  It's a simple tool, fill the barrel halfway with stainless steel shot (bought with the tumbler), a small amount of cleaning solution (see what your instructions recommend), place your pieces and fill with water just above the shot.  I run the tumbler for 2-3 hours depending on the degree of tumbling the pieces appear to need.  Below you can see the difference from the white fire-scale to the shine out of the tumbler.  A word of caution, soft materials such as pearls and turquoise may react badly with your cleaning solution, so know its compatibility and be sure precious metals are actually precious or the stainless steel shot may reveal more than a high shine!