Showing posts with label Art Clay Silver. Show all posts
Sunday, March 9, 2014
Winter's Work
I have a wonderful and warm studio to work in, but it can still be tough during the long winter months to stay motivated. This is often a time I turn to pieces that have been abandoned during the year and try to problem solve them to resolution. This little hollow pod had much potential, but I was struggling with how to resolve a large hole torn in the bottom. A CZ rolling around my bench served as the perfect inspiration! I even enclosed a few on the inside so that it jingles when you shake it.
Labels:
Art Clay Silver,
CZ,
Inspiration,
Metal Clay,
pod,
Studio
Sunday, February 9, 2014
Gold Accents in Metal Clay
I love silver. I always have. Maybe it's because I have childhood memories of traveling to the southwest and seeing beautiful silver and turquoise work. Maybe it's because there so many cultures from so many different parts of the world that have stories of silver that are incorporated into their mythologies. I just know it is one of the materials I have always been drawn to. That does not by any means make it the only material I work with. Every once in a while, a piece calls for something more. The piece featured in this post was inspired by "Pele's Hair", volcanic glass threads that are created when molten material is thrown into the air. They look like piles of golden volcanic hair and called for some color accents to this piece.
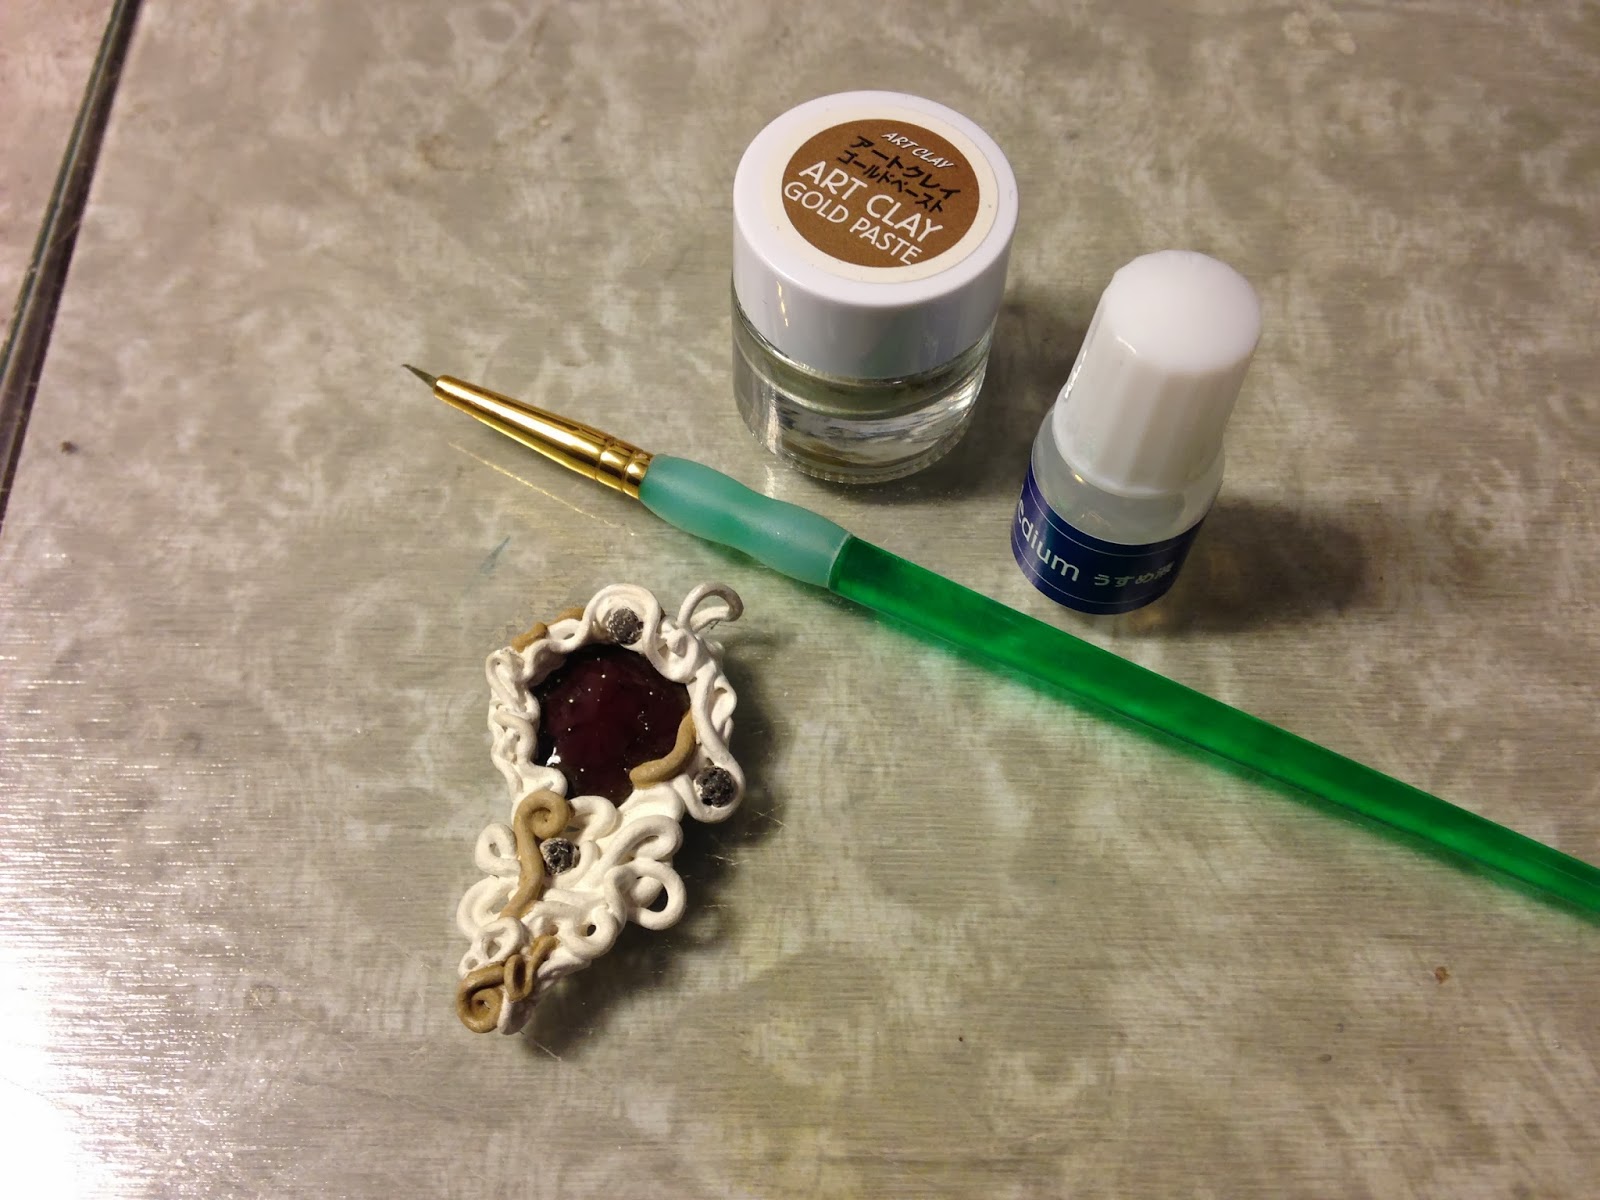
Before incorporating the gold, the base form was built using silver clay coils wrapped around black glass and volcanic beads. The piece was fired in the kiln to burn out the clay binders and just leave the glass, beads and silver. When silver comes out of the kiln, it has a matte white finish that is normally brushed to reveal the shining metallic surface, not in this case. I applied overlay paste to the areas I wanted to accent. Once dry, I slowly built up layers of the gold paste until it reached a mustard color. At this point it can either be kiln fired or torch fired to burn out the binder and leave the gold. The key is speed! On the above right, there is an image of the piece glowing from the torch fire, once that glow appears (this is best done in the dark) you are only holding it for a few seconds. Any longer and the gold and silver will melt together and you will lose your accent. The more layers of paste, the deeper the color in the end. Just like silver, after firing it will still be that matte mustard color and must be brushed to reveal its luster.
I used Art Clay Gold Paste over the fine silver to create these accents. After firing the gold left is 22k and can be used on glass and porcelain, as well. While this is a relatively affordable way to work with gold, at the end of the day it is real gold and you are still paying market price for it. I initially worked with both gold paste and gold sheet in my senior certification class with Art Clay World. The instructions that come with both are good and there are lots of great video tutorials online, but for the price of gold it is really something best introduced in a class with an experienced teacher. It will save you frustrations and some very expensive experimenting!
Labels:
Art Clay Gold Paste,
Art Clay Silver,
Art Clay World,
Contrast,
Gold Accents,
Hawaii,
Lava,
Metal Clay,
Pele's Hair,
Torch Fire
Sunday, December 22, 2013
Silver Bells
This month's challenge for the Metal Clay Artisan Guild in CT was to create a unique charm that represents our personal work for our end of the year meeting. The charms will be swapped with those participating with one extra created for a bracelet the Guild will be auctioning off for charity. I created a set of "Silver Bells" based on these small dried blossoms I picked from my yard earlier this fall. The delicate nature and size of these pieces made them a real challenge for me as I had to taylor my process to a more production-like level. Each piece features a fine silver wire bail to hang from and a liver of sulfur patina that left behind these wonderful hues of red and green - which may have been my favorite part. I approach my silver work as a sculptor, making unique organic forms, but this was a really good opportunity for me to problem solve from the jewelry end of the spectrum. I think these monthly group challenges will lead to a lot more individual growth for members than I had anticipated. Can't wait to see what everyone else creates!
Sunday, October 27, 2013
Annual Guild Show
This week in the studio has been a bit of a frenzy getting ready for our Metal Clay Artisan Guild in Connecticut's Annual Show and Sale. If you find yourself in CT next weekend, come out and join us! Friday evening will kick with a reception to meet the artists and Saturday will bring hourly technical demonstrations for those who are interested in learning more about metal clay. My ring featured on the front of the show card will be part of the guild display and we will all have collections of work for sale. Its a great time to meet local artists, learn more about metal clay and get started on your holiday shopping.
Demonstrations:
10:30am - Creating Textures directly in Metal Clay
11:30am - Carving Metal Clay Forms
12:30pm - Using Two-Part Molds with Metal Clay
1:30pm - Working with Mixed Metals in Metal Clay
2:30pm - Working with Metal Clay Coils
3:30pm - Working with Metal Clay in Paste Form
4:30pm - Carving Texture Plates for use with Metal Clay
Don't Forget! Bring a non-perishable food donation to receive a raffle ticket for door prizes created by the participating artists.
Sunday, October 13, 2013
Repairs in (fired) Metal Clay

"The best laid plans..." don't mean a thing when you open the kiln and realize you've changed your design in your head. In this case, I decided I wanted to remove the bail I had been unhappy with all along for a coil based design. This meant taking the torch to the piece, which took just long enough to cut the old bail off to put a small hole in its side. Sigh. Not to worry though, I am a big fan of Art Clay Silver's Oil Paste which was the solution to both these problems. There are a lot of DIY metal clay oil paste recipes, but I am a big fan of a sure thing when I am already investing a fair amount of time and money. A jar of it is a great investment to keep on hand and seems to go a very long way. It actually has two parts - the oil (a thinning agent) and the paste (a thick, dry consistency) - you mix the two together as you go to use it. In the case of the hole in the side, I painted it on, allowed it to dry and pasted a patch over the area. The side view above is the same as the side view to the left with a hole in it. I then wanted to add my new bail and coated the contact areas of the fired piece with the oil paste, allowed it to dry and attached the fresh coil. I then re-fired it according to directions. The oil paste is able to bond with the fine silver so you can make repairs, add fine silver findings to fired pieces or even torch fire fine silver bezel wire seams. It's one of those great materials that I wouldn't go without in the studio because that would be the very moment you needed it!
Labels:
acs,
Art Clay Silver,
bail,
bezal,
Fine Silver,
Metal Clay Repairs,
Oil Paste,
PMC,
pod,
Silver Clay
Sunday, June 16, 2013
Repoussé Effects in Metal Clay

Repoussé is a traditional metalworking technique where a raised or relief surface is created on the front of the metal by hammering a design from the back of the metal. It is a french term whose origins mean to push from behind. It is often used along with another traditional technique called "chasing" where the design is then sharpened or refined from the front by sinking in the metal on that side. The effect of repoussé and chasing creates what is often referred to as embossing. You are dealing with the elastic qualities of a malleable metal, so there is no actual loss of metal.
This is a relatively simple technique to replicate in metal clay while the material is in its clay state. It is a great way to incorporate original designs and textures, even for the beginner artist. You will need something to create your impression with, the pieces in this post were done using scratch foam, so that is the process I will focus on here. Scratch foam is a popular and economic material used in basic printmaking. If you think it is an elementary school material, check out the sophisticated prints by artist Annette Mitchell who is able to get woodcut-like imagery from recycled meat trays. If you can not find it at a local craft store, you can always use cleaned foam trays from the supermarket. Just cut yourself a square to work with.
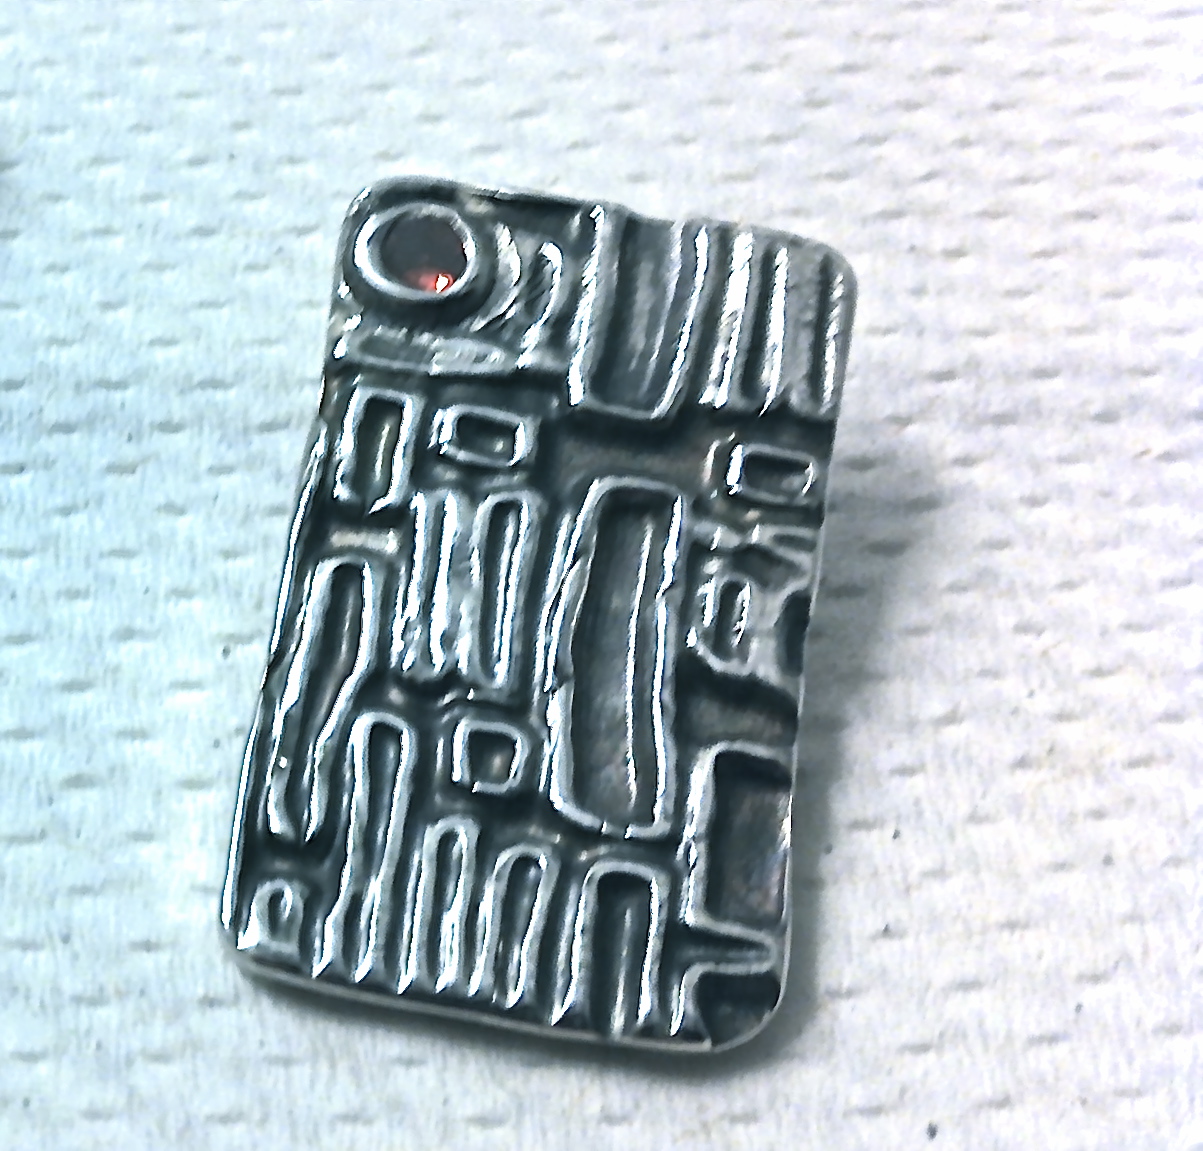
Begin by working out a simple design. I did a series of pieces based on swirling cloud patterns, they all began with the same frame, but I played with the interior a little differently on each piece. I like working out designs like this on tracing paper so that I can quickly replicate elements I am happy with. I then tape the tracing paper to a piece of scratch foam and lightly go over it with a ball point pen, just enough to get a slight indent in the surface. I then use an embossing tool to go over the lines, but maintain medium to light pressure. Each time the lines will become more pronounced, but I don't end up ripping or wrinkling the foam. As the lines get deeper, I change the gauge of the embossing tool if I want thicker lines. The key is patience until you get a feel for the right pressure on the foam. If you are looking simply to create texture sheets to emboss with, you can use anything you can dent the surface with from a comb to a meat tenderizer. Keep in mind the scratch foam has a more "smooth" side and a more "rough" side, you will need to look closely at the foam to discern this, I recommend carving into the smooth side. In any case, the surface of the clay will pick up the surface of the foam, which is more subtle on one side than the other.
Once the design is carved in the foam, I lube the foam so the clay will eventually release. I set my rolling slats (or cards) on top of the foam on either side of the design a little thicker than I want the piece to account for the raised areas. If the piece of foam is too small to support the width of the slats, I lay additional slats (or cards) next to the foam to keep them even. I then roll my clay into the design the same way I would roll it onto any other texture plate. I then gently pull it off and trim the excess. Once dry, they are fired and finished the same as any other piece. The bonus of the scratch foam is that it is relatively inexpensive and fairly forgiving.
If you chose the wrong side and this impacts your design (which you will be able to see as soon as you pull it off) simply smooth your metal clay piece with a damp sponge - as long as you are light with your pressure it will clean up the surface without removing the embossing. Also, remember this is a printmaking process - you are essentially creating a "stamp" that you are embossing your piece with so your design must be the REVERSE of what you plan. In a symmetrical design this does not matter, but in the design of a piece like I did here it can make a difference. I planned it backwards because I have done this enough times to think about it that way. If you are not quite there yet, this is another good reason to workout designs on tracing paper, because you can then lay them on the foam on either side. If you draw your design exactly the way you want it, you should then lay the tracing paper face down on the foam. It will reverse the design on the foam and come out the way you intend in the clay. Since it's tracing paper, you can see through it and can still easily trace it.
Labels:
Annette Mitchell,
Art Clay Silver,
Embossing,
Metal Clay,
PMC,
Repoussé,
Scratch Foam,
Silver,
Silver Magpie Studio,
Texture
Sunday, June 2, 2013
FastFire BRONZclay Success!
After feeling a bit "burned" by base metal clays a few months ago, I went ahead and tried a new brand on the recommendation of jewelry artist Evelyn Pelati. I went with FastFire BRONZclay by Metal Adventure and was happy with the results for a variety of reasons. Here are a few...
To begin with the obvious, it fires fast. It takes an hour to ramp and an hour to fire. It is a one phase fire, so set the kiln and forget it. I was looking for a base metal clay to use with multiple classes, so I do not always have the luxury of being able to run a multi-phase firing during my teaching schedule. This allows me to not have to return to run a firing on my own time.
There is the other obvious of the price, with bronze clays being around 30 cents a gram and silver clays being more than $2 a gram, it is the most economical, especially for introducing it to a large class.
The firing directions are clear and easy, particularly if this is your first attempt at base metal clays. The descriptions of what you will find out of the kiln and what that means for your firing temperatures are also clear. I was able to figure out my firing schedule after just two test fires, though I have had to make adjustments based on running a whole class worth of pieces at a time.
I have also been able to successfully fire in a ceramic firing vessel. Since I am flip-flopping between silver and bronze, depending on the class, I am running multiple firings a day. When you fire in a steel pan there is a black flake sort of fire scale that needs to be vacuumed from the kiln after your firings. With a ceramic vessel, there is no evidence of the base metal firing.
Last, the workability of the clay has been great. It has a silky flexibility that makes it great for draping and forgiving for students just learning to work with it. When it dries, it is easy to reconstitute and continue working.
These were a couple of quick test pieces where the clay was rolled into scratch foam designs and run through the firing. The bronze has a warm gold hue and nice weight once fully sintered.

Labels:
acs,
Art,
Art Clay Silver,
base metal clays,
bronze clay,
Bronze Metal Clay,
coconut carbon,
FastFire BRONZclay,
Fire Scale,
Jewelry,
Metal Clay,
PMC,
Silver Magpie Studio,
sinter,
White Bronze
Sunday, May 19, 2013
Carving in Metal Clay
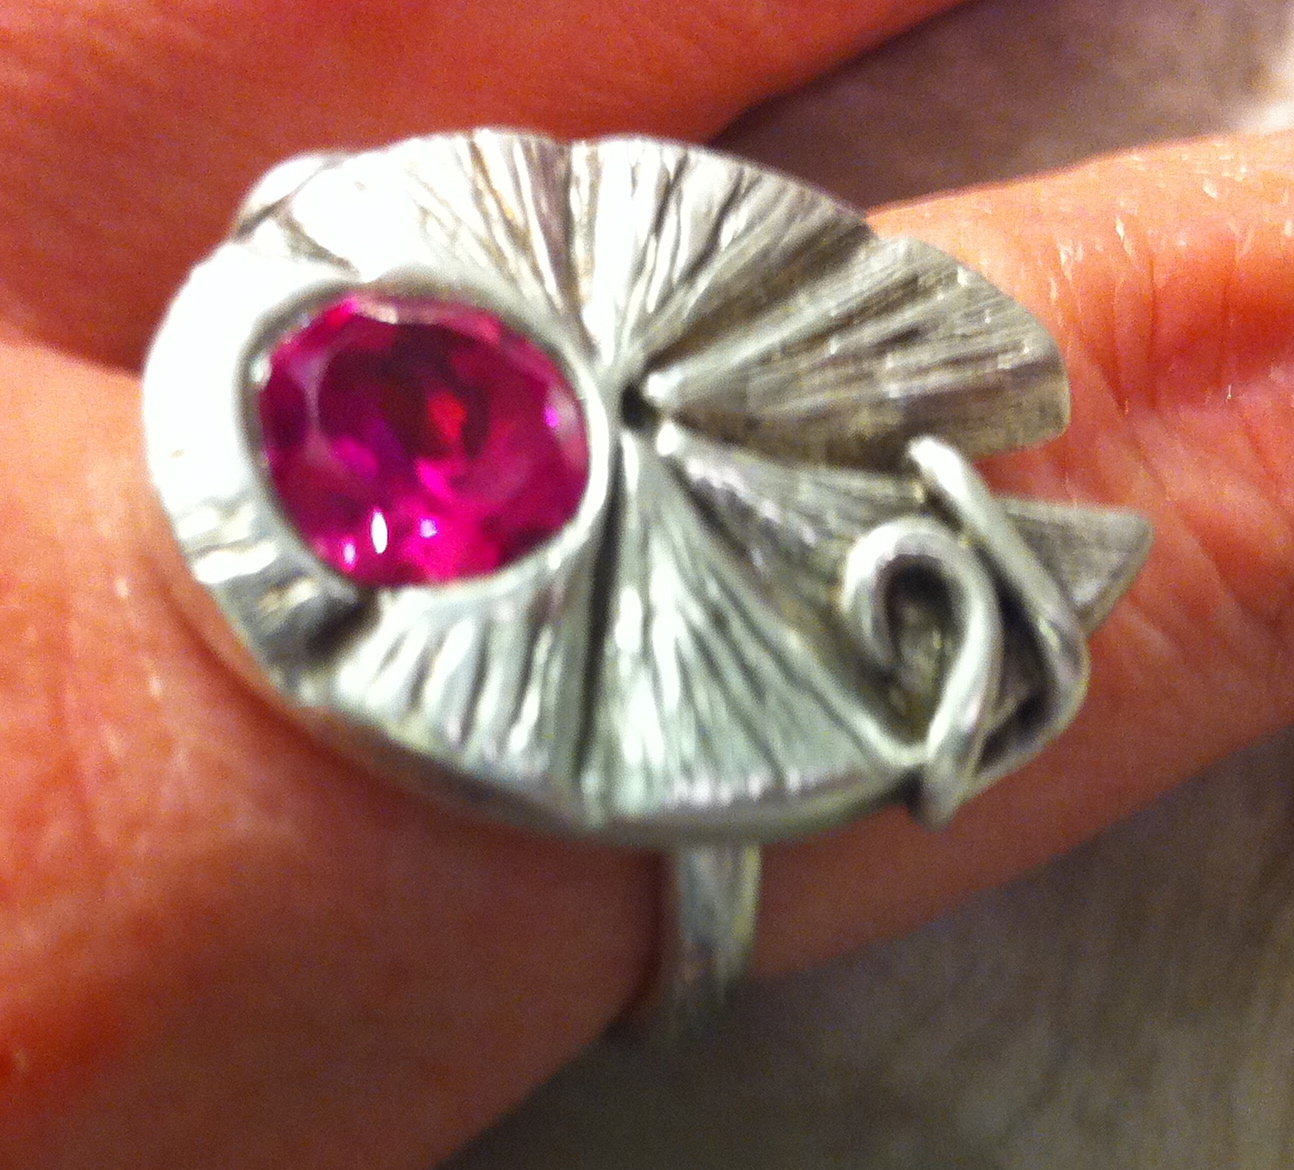
This week's challenge was to translate a carved design into the top of a ring. I was inspired by this bright pink 8mm CZ and couldn't resist the temptation to nestle it safely into a lily pad. The perfect pink floral accent to the top of this piece. I balled up my clay and squished it into a flat pancake the same height as the CZ. I poked a hole with a straw and sank the CZ in until the top of the clay surrounded it. I then cut out my initial shape of the lily pad and let it dry. Once bone dry, the clay is very easy to carve, especially at this thickness. I find that small diamond files are the best carving tools in this dry material. It has a similar feel to plaster carving. I began with my general design and deeper lines and then carved the more detailed texture, each time lightly scratching or "drawing" in my design before begining to file. The secret is no pressure. The tools are sharp and just need to be trusted to do their job. I added a coil to keep the eye moving around the piece and finished the ring with a liver of sulfur patina to bring out the richness of the texture.
Labels:
Art,
Art Clay Silver,
Botanical,
Coil Bails,
Jewelry,
lily pads,
Liver of Sulfur,
Metal Clay,
monet,
Organic,
Patina,
PMC,
Silver,
Silver Magpie Studio,
Stone Setting
Sunday, April 21, 2013
Tool Tip: Stone Setting Trick
Setting tiny stones can be frustrating at times. There are great shaped tweezers for picking up pearls or or other larger shaped pieces, but what about a small stone? I recently saw that companies are now selling "Stone Pickers" to help with this, which is a great solution, but one you really can do for yourself without the extra charge. Any pointed tool, from a pin tool to a dental tool, with a small ball of wax or even poster putty on the end creates the sticky finger you need to place the stone. If you are having trouble with it rolling off the tip when you have it in place, a pin tool in the other hand can give it a gentle push into place.
Labels:
Art Clay Silver,
Base Metal Clay,
Bronze Metal Clay,
craft,
PMC,
Silver Magpie Studio,
Stone Setting
Sunday, April 7, 2013
Tool Tip: Taming the Tumbler Shot
Back in December, I posted about using a tumbler to polish up your finished pieces in an article titled: Tumble & Shine (that post can be read here.) As the pieces rotate in the tumbler they are surrounded by steel shot and cleaner, this means there is always the chance of that shot getting lodged in open areas, whether it is an enclosed bail or openings in a hollow form. I'll admit that I'm the first to throw caution to the wind and opt for taking the risk of running an item through the tumbler to see what happens. I have a series of hollow organic forms that have a lace-like outer-surfaces that always trap the shot. In these cases I usually end up trying to pick it out with small tools or simply sitting at my bench and shaking and shaking (and sometimes cursing) and then shaking some more until I get them all out. After seeing my pieces, another jewelry artist asked if I was tumbling them and suggested I try putting pipe cleaners through the openings to block the shot. Above, you can see they look a little silly, but were well worth the suggestion. They tumbled for about 3 hours and the pipe cleaners held up fine. I was suspicious that the one on the right that was full of openings and now surrounded by pipe cleaners might not get much benefit from the tumbler, but I was wrong. I did intentionally leave the pipe cleaners wide open to allow the shot in and it worked, tumbled up nice and bright. In the piece on the left the pipe cleaner is run through the bail, twisted to stay in place and then the end was bent in to prevent it from scratching other pieces being tumbled. In the piece on the right, the ends of the pipe cleaners are forced into the openings and bent into positions to hold themselves in place, I was expecting some to have fallen out by the end of the tumbling, but they were fine. This was a great tip that should save me a lot of time in the future!
Labels:
Art Clay Silver,
Base Metal Clay,
Bronze Metal Clay,
craft,
Jewelry,
Lortone,
Metal Clay,
PMC,
Polish,
Shine Brite,
Tumble,
Tumbler
Sunday, March 24, 2013
Liver of Sulfur Patina
I tend to use glass bowls when working with different chemicals in order to reduce the potential for reaction and ensure they are able to be cleaned when done. Remember, once something has been used in the art studio, it should never go back to the kitchen for food use. Liver of Sulfur should be used in a well ventilated area because it stinks (like sulfur). Either your Liver of Sulfur solution or the metal should be hot in order to improve the reaction. Depending on how strong you mix the solution, metal in the general area (like rings on the hand mixing the solution) can react to it in the air, so consider removing your own jewelry before you begin.
I dissolved a small lump (a very small pea-sized piece) of Liver of Sulfur in about a cup of very hot (not boiling) water in a glass dish. In the dish next to it I had cold water and Baking Soda to serve as a stop-bath. I ran yarn through the bails to keep my fingers clean, dropped each piece in, it only takes seconds to get a rich black, pulled them out and dropped them in the stop-bath. Liver of Sulfur has a wonderful range of iridescent blue to deepest black, so if you watch it close you can pull the piece out and stop the reaction at the exact color you are looking for. After a quick dip in the stop-bath, they are rinsed, dried and ready to be finished.
Above, you can see that the pieces have a rich black patina, so it is time to start bringing back the highlights to show all the depth in the texture. I prefer to use very fine steel wool to buff the raised areas of the piece. Below you can see a finished piece with more defined texture and antiqued look. Remember to follow the recommendations on the package for disposal of Liver of Sulfur solution once you are finished with it. The best part is that if you are unhappy with it, you can toss the piece back in the tumbler (or go at it with any variety of buffing/sanding tools) and strip the patina off to start again.
Labels:
Art,
Art Clay Silver,
craft,
Jewelry,
Liver of Sulfur,
Metal Clay,
Patina,
PMC,
Silver,
Silver Magpie Studio,
silver pendant
Sunday, March 10, 2013
Barrel Bails
I recently spent some time playing with designs for barrel shaped bails that would sit behind and on top of small geometric pendants I had been creating. They were all part of a small series that I wanted to keep unified, so I needed a versatile design that would fit the varying shapes, while staying visually cohesive. For these pieces, I began by rolling out a sheet of metal clay 3 cards thick. I cut it into a long rectangle, wrapped it around a straw I had rubbed with olive oil and sealed it's seam. I let it stiffen up for just a few minutes before beginning to slice it on the straw. I held my knife in place and rolled the straw to get an even cut. I then spaced out each of the pieces and set them to dry in place on the straw. Once they were bone dry, I gently slid them off and sanded them before attaching them to my dried pendants with slip. Starting with the longer piece and cutting it apart allowed me to make several pieces at once and vary their sizes to fit the individual pendants they would be attached to. It was important to cut them on the straw in order for the clay to stay supported and not collapse under the pressure of the knife due to its hollow center.
Labels:
Art,
Art Clay Silver,
Bails,
craft,
Hidden Bails,
PMC,
Silver,
Silver Magpie Studio,
silver pendant,
Studio
Sunday, February 3, 2013
Frosty Patina
This dome shaped piece was developed as part of my series of reflective pendants inspired by the ocean. Finished on a cold January evening as the east coast plummeted into a deep freeze, the frosty patina on its surface is reminiscent of the wintery afternoons I have spent watching the waves crash on the Narragansett beach with my mother. To achieve this frosty, swirling patina I began with black alcohol ink and mixed a few drops of snowcap white alcohol ink binder. This creates a dark bluish ink that is thick and dries very quickly. I painted it on and let it dry, but was unhappy with how dark the patina came out. I dropped the piece in a cup of rubbing alcohol to remove the color and it began to lift off in layers. This was a very different effect than I have seen in the past when removing this ink and assume it is due to mixing it with the binder. When it reached this particular shade of ice blue with some dark areas creating depth in its crevices, I pulled it out and stopped the reaction. I'm excited about the potential this process has in creating varied layers of value with the inks and will be experimenting with other colors in combination with the binder.
Labels:
Alcohol Ink,
Art Clay Silver,
craft,
Metal Clay,
Narragansett,
Ocean,
Patina,
PMC,
Silver Magpie Studio,
silver pendant,
Waves
Sunday, January 6, 2013
White Bronze Continued
For those of you keeping track, this is my fourth test fire with White Bronze. Those first three trials can be seen in last week's post. After contacting the manufacturer, I took their specific notes on my previous firing trials and began by elevating the firing vessel even higher. I increased it's height by adding another set of stilts so that its rim sat just below the top of the kiln. This was recommended since even in my small counter top kiln the difference in temperature from floor to lid can be 300 degrees. My next step was to do both phases of the firing with the pieces buried in the coconut carbon, it was stressed that White Bronze MUST be buried even for the binder burn off phase with the lid off the vessel. Since both phases are being done buried in the carbon in the kiln, there was no need to cool in between, so I took the recommendation of the following schedule:
PF1:1000F
HOLD:2hrs
RA2: Full
PF2: 1250F
HOLD:2hrs
RA3: 000
START
The above image on the left shows the char on top of the carbon after the completed firing had cooled. This time I definitely smelled more of a "campfire" smell from the kiln than the previous firings, so I do believe it got significantly hotter. On the right you can see the test pieces out of the kiln, they already appeared stronger. There were no cracks and they handled well, so I had hope that the firing had been successful. I took some 220grit sandpaper to the test pieces and removed enough fire scale to reveal a metallic interior. As I had found out last week, the water drop test does not apply to White Bronze and the way to check is to sand with 220 grit to reveal the bronze, without small particles coming off. I was really excited and gave the pieces a wiggle with my fingers, at which point they each snapped in the middle.
Grrrrrrrrrr!
So back to the drawing board. What I do know is that the carbon burned hotter this time and the binder appeared to successfully burn out. What I don't know is whether the White Bronze was at its full firing strength. The other thing I learned last week was that even when fired properly, it is very fragile and should really never be used alone. It was recommended that it be used in combination with other materials for strength. If it is used alone and fired successfully, customers need to be warned that it is a very fragile material and does not have the traditional strength expected from metals meaning the introduction of other tools such as hammers or pliers would result in it breaking, as well as if it is dropped on a hard surface. My question still remains as to whether or not I should be able to break it with my fingers. I plan to email these results to the manufacturer to see if this really is the brittle level of this material or if I should slowly bump the second phase firing by 10 degrees. I will keep you posted...
Labels:
Art Clay Silver,
Base Metal Clay,
Bronze Metal Clay,
coconut carbon,
Jewelry,
Metal Clay,
PMC,
White Bronze
Sunday, December 30, 2012
White Bronze Explorations
I've spent the last few weeks exploring White Bronze Metal Clay. The clay comes in powder form and can be mixed easily. The mixed clay is silky and flexible. It was easy to work with and was quick to sand. I was excited to see how the pieces came out once fired, but that's where my trouble began. So far I have fired three different test pieces, each ending with different problems. Below is a page from one of my firing notebooks, and at the bottom are the results. Test Fire #1 was based on the directions from the clay, in the end the center appeared sintered, but the edges were fragile enough to snap off. Base metal clays must be fired buried in carbon, this is done inside a vessel in the kiln. For test firing #2 I altered my firing parameters based on suggestions from my vessel's manufacturer. This time, the piece was far weaker and crumbled like a cookie when wiggled. For my third test fire, I reached out to other metal clay artists working in bronze and adjusted my firing schedule accordingly. This resulted in the piece splitting and then crumbling.
I was reassured by other metal clay artists that initial explorations in bronze required several test fires since everything from the kiln type to carbon type to vessel type to bronze type effects firing, but was still a bit disheartened. I contacted the manufacturer of the white bronze and they immediately responded. You can see in my firing notes below their direct feedback on my trials. The key points include the following:
-The water drop test used in other bronze clays to check for sintering, is not a valid test for White Bronze.
-Both phases of firing must be done in a kiln, buried in carbon - this includes the first phase where the binder is burned off.
-Even the small kiln I use for firing can have a 300 degree difference from the floor to the lid, so the vessel must be up on stilts to best achieve high temperatures.
-The lid should be off the vessel for both phases of the firing.
-When both phases of firing are done in the kiln, there is no need to cool in between.
-The following firing was recommended:
Vessel on Stilts/No Lid for entire firing
Piece buried for entire firing
Phase 1: Full Ramp to 1000F hold 2hrs
No Cool
Phase 2: Full Ramp to 1250F hold 2hrs
Test cooled pieces with 220grit sandpaper, if it is metallic it's good.
*** On a side note, the instruction manual for White Bronze is part of the manual for the entire collection of base metal clays and therefore a little confusing as they are all talked about together. In the manual, it does say it is a brittle metal when made into thin pieces and recommends it being used in combination with other clays for strength. The email response I receive basically asked why I would be using it alone to begin with and that it NEEDS to be used in combination with other metals. That it should not be used alone and even if you do get it to fire correctly, customers need to understand that their piece will be VERY fragile. This really is different than how it is presented in the manual. I went back and checked on the manufacturer's website and no where does it note that White Bronze is any different than the other base metal clays, you only learn that once you download the manual which I imagine most people do not do until they order it. This is something which I find a bit frustrating, it should be more clearly noted as part of the product description. I really didn't see the red flags until the manufacturer questioned my use of it because the manual is not that direct. My persistence in firing it correctly is partially to see the process through and partially to complete the handful of pieces I have in White Bronze that are waiting to be fired.
So my next step? More test pieces next week based on the above suggestions. Wish me luck!
Labels:
Art Clay Silver,
Base Metal Clay,
Bronze Metal Clay,
Jewelry,
Metal Clay,
PMC,
White Bronze
Sunday, December 23, 2012
Alcohol Ink Patina on Metal Clay
As I got to the finishing stages of this series, I knew I wanted to really bring the texture out and that the best way to do that was with a patina. Liver of Sulfur is a traditional way to get a variety of tones, but requires precise timing for colors beyond black and a strong stomach as it does stink up the immediate area. In looking for another option, I began experimenting with alcohol ink on the recommendation of a friend and have really been happy with the results. Alcohol inks are sold in the scrapbooking section of most craft stores. They are a solvent based ink and work great on non-porous surfaces, from metal to glass to super glossy paper and they come in dozens of colors. I wanted to antique this piece with turquoise tones to really draw on its references to the ocean. I took my fired and polished pendant and just touched the tip of the ink bottle to the surface and let the ink run through the crevices of the texture. It only takes a few moments to dry and then I start buffing it off with a super fine piece of steel wool. I also like to dab a little on my maker's mark on the back to pronounce it a little more. I clean up edges and brushes (if I use them) with rubbing alcohol. Remember to protect anything you don't want to be stained by this ink, such as findings or stones. Since I am using the ink as a patina that sits down inside the texture and all the ink has been removed from the surface, I do not seal it because it is no more likely to rub off than a liver of sulfur or other such patina.
Labels:
Alcohol Ink,
Art,
Art Clay Silver,
Custom Jewelry Stamps,
Jewelry,
Maker's Mark,
Metal Clay,
Patina,
PMC,
Quality Stamps,
Silver Magpie Studio,
silver pendant
Sunday, December 16, 2012
Tumble & Shine
Once I resolved the bails on this small series of simple pendants, it was time to fire and tumble them. When silver clay is fired it does not come out looking shiny and metallic. When I first tried metal clay I thought I was under-firing it because it kept coming out white. Now I know that white is simply the fire-scale on the surface of the metal (below left). It easily comes off with a brass brush, but leaves the silver sort of matte and in need of polishing. A tumbler is a great way to polish up your pieces (not just metal clay) and it serves to help work-harden your pieces. It also softens burrs that might be on your metal. Tumblers range in price, I use the small inexpensive one above and can fit a number of pieces into it. It's a simple tool, fill the barrel halfway with stainless steel shot (bought with the tumbler), a small amount of cleaning solution (see what your instructions recommend), place your pieces and fill with water just above the shot. I run the tumbler for 2-3 hours depending on the degree of tumbling the pieces appear to need. Below you can see the difference from the white fire-scale to the shine out of the tumbler. A word of caution, soft materials such as pearls and turquoise may react badly with your cleaning solution, so know its compatibility and be sure precious metals are actually precious or the stainless steel shot may reveal more than a high shine!

Labels:
Art,
Art Clay Silver,
Fire Scale,
Jewelry,
Lortone,
Metal Clay,
PMC,
Polish,
Shine Brite,
Silver Magpie Studio,
silver pendant,
Tumble
Sunday, December 9, 2012
Hidden Bails in Metal Clay
For the largest pieces in this series, I decided I did not want the bail to become a decorative element. It was important for these pieces to maintain their simplicity and that meant building hidden bails for them. I rolled out my clay and decided an elongated oval would be the best shape and cut it to the length of the entire back. I chose to wrap it around a straw and made sure it had been rubbed with olive oil to prevent the clay from sticking. After cutting the oval, I slid my pin tool under one end and gently lifted the piece off my working mat. I draped it over the straw and gave it a moment to set up. I wet the back of my piece and placed pasted where the two ends of the bail would come into contact with the pendant. I lifted the straw and placed the bail, gently pressing each end to secure it and cleaned up around its edges. Once the piece began to dry enough so it would hold its form, I gently twisted the straw as I pulled it out. I didn't want to wait until it was completely dry because I was concerned it would shrink too tight around the straw.
Labels:
Art,
Art Clay Silver,
Hidden Bails,
Jewelry,
Metal Clay,
PMC,
Silver Magpie Studio,
silver pendant
Subscribe to:
Posts (Atom)