Sunday, December 30, 2012

White Bronze Explorations

I've spent the last few weeks exploring White Bronze Metal Clay.  The clay comes in powder form and can be mixed easily.  The mixed clay is silky and flexible.  It was easy to work with and was quick to sand.   I was excited to see how the pieces came out once fired, but that's where my trouble began.  So far I have fired three different test pieces, each ending with different problems.  Below is a page from one of my firing notebooks, and at the bottom are the results.  Test Fire #1 was based on the directions from the clay, in the end the center appeared sintered, but the edges were fragile enough to snap off.   Base metal clays must be fired buried in carbon, this is done inside a vessel in the kiln.  For test firing #2 I altered my firing parameters based on suggestions from my vessel's manufacturer.  This time, the piece was far weaker and crumbled like a cookie when wiggled.  For my third test fire, I reached out to other metal clay artists working in bronze and adjusted my firing schedule accordingly.  This resulted in the piece splitting and then crumbling.  

I was reassured by other metal clay artists that initial explorations in bronze required several test fires since everything from the kiln type to carbon type to vessel type to bronze type effects firing, but was still a bit disheartened.  I contacted the manufacturer of the white bronze and they immediately responded.  You can see in my firing notes below their direct feedback on my trials.  The key points include the following:
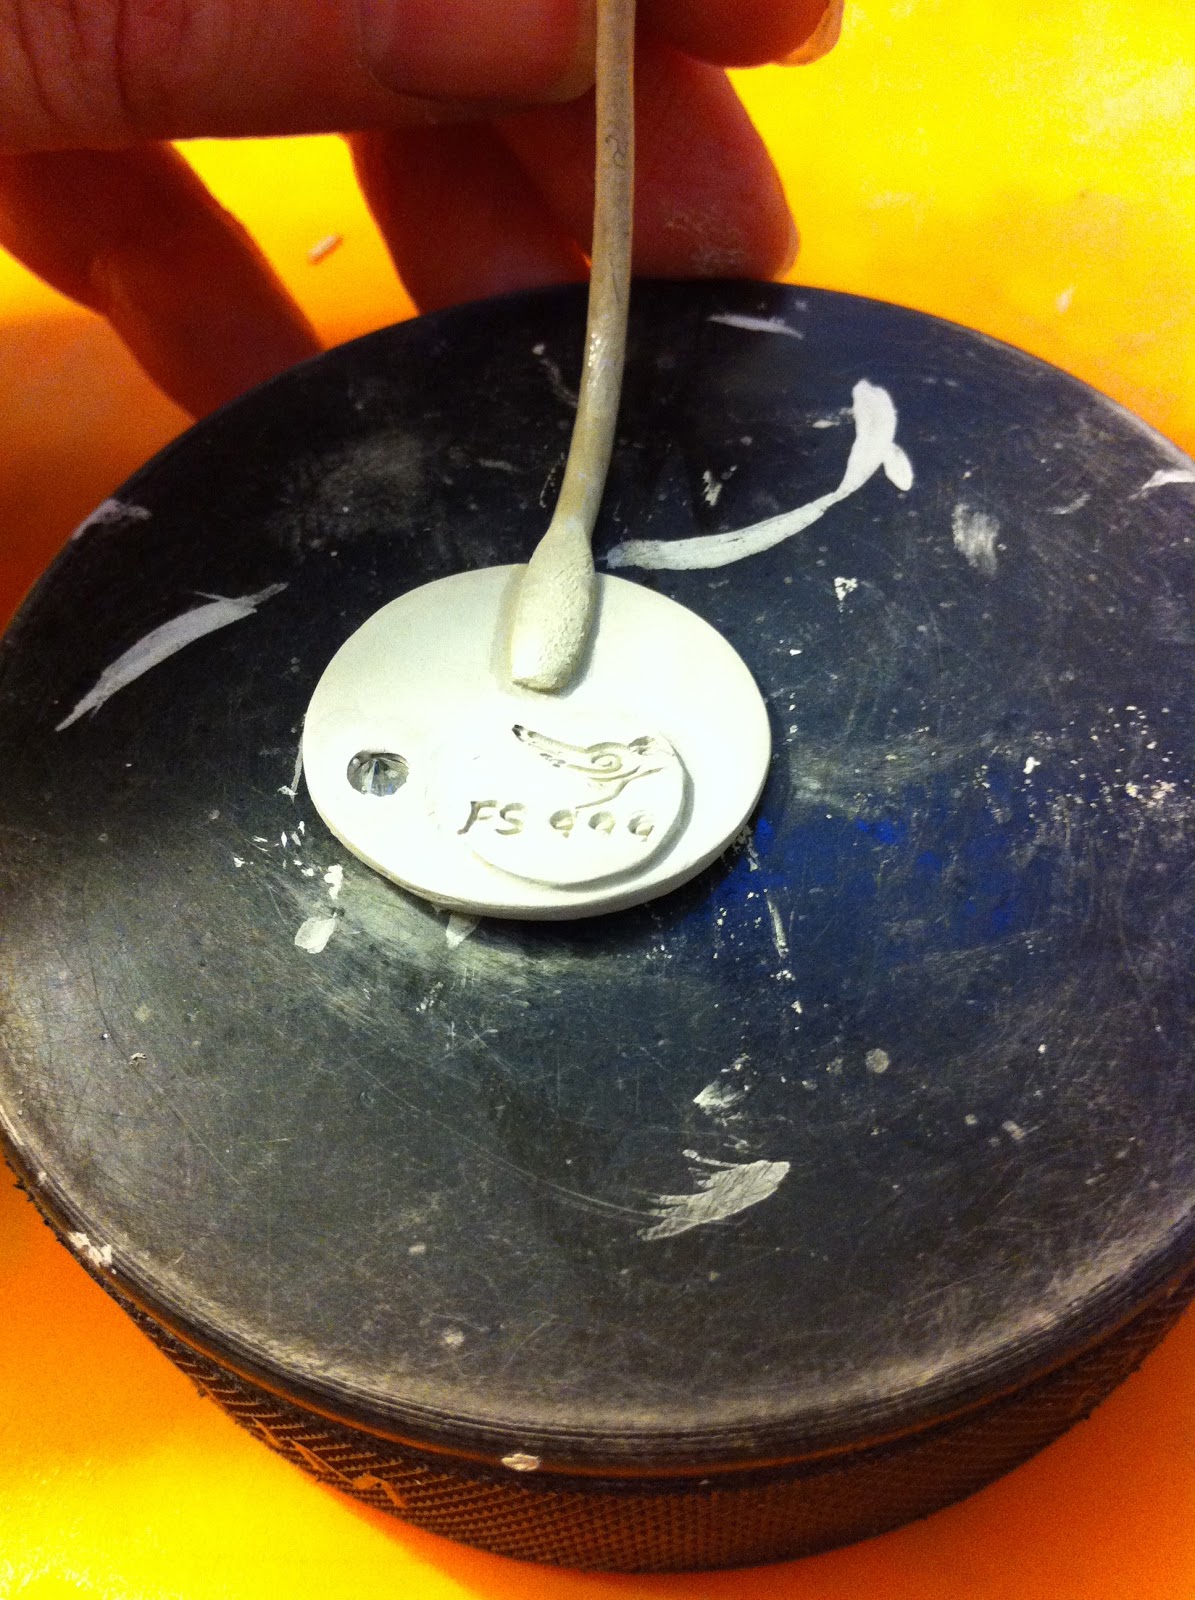
-The water drop test used in other bronze clays to check for sintering, is not a valid test for White Bronze.
-Both phases of firing must be done in a kiln, buried in carbon - this includes the first phase where the binder is burned off.
-Even the small kiln I use for firing can have a 300 degree difference from the floor to the lid, so the vessel must be up on stilts to best achieve high temperatures.
-The lid should be off the vessel for both phases of the firing.
-When both phases of firing are done in the kiln, there is no need to cool in between.
-The following firing was recommended:
Vessel on Stilts/No Lid for entire firing
Piece buried for entire firing
Phase 1:  Full Ramp to 1000F hold 2hrs
No Cool
Phase 2:  Full Ramp to 1250F hold 2hrs
Test cooled pieces with 220grit sandpaper, if it is metallic it's good.

*** On a side note, the instruction manual for White Bronze is part of the manual for the entire collection of base metal clays and therefore a little confusing as they are all talked about together.  In the manual, it does say it is a brittle metal when made into thin pieces and recommends it being used in combination with other clays for strength.  The email response I receive basically asked why I would be using it alone to begin with and that it NEEDS to be used in combination with other metals.  That it should not be used alone and even if you do get it to fire correctly, customers need to understand that their piece will be VERY fragile.  This really is different than how it is presented in the manual.  I went back and checked on the manufacturer's website and no where does it note that White Bronze is any different than the other base metal clays, you only learn that once you download the manual which I imagine most people do not do until they order it.  This is something which I find a bit frustrating, it should be more clearly noted as part of the product description.  I really didn't see the red flags until the manufacturer questioned my use of it because the manual is not that direct.  My persistence in firing it correctly is partially to see the process through and partially to complete the handful of pieces I have in White Bronze that are waiting to be fired.

So my next step?  More test pieces next week based on the above suggestions.  Wish me luck!


Sunday, December 23, 2012

Alcohol Ink Patina on Metal Clay


As I got to the finishing stages of this series, I knew I wanted to really bring the texture out and that the best way to do that was with a patina.   Liver of Sulfur is a traditional way to get a variety of tones, but requires precise timing for colors beyond black and a strong stomach as it does stink up the immediate area.  In looking for another option, I began experimenting with alcohol ink on the recommendation of a friend and have really been happy with the results.  Alcohol inks are sold in the scrapbooking section of most craft stores.  They are a solvent based ink and work great on non-porous surfaces, from metal to glass to super glossy paper and they come in dozens of colors.  I wanted to antique this piece with turquoise tones to really draw on its references to the ocean.  I took my fired and polished pendant and just touched the tip of the ink bottle to the surface and let the ink run through the crevices of the texture.  It only takes a few moments to dry and then I start buffing it off with a super fine piece of steel wool.  I also like to dab a little on my maker's mark on the back to pronounce it a little more.  I clean up edges and brushes (if I use them) with rubbing alcohol.  Remember to protect anything you don't want to be stained by this ink, such as findings or stones.  Since I am using the ink as a patina that sits down inside the texture and all the ink has been removed from the surface, I do not seal it because it is no more likely to rub off than a liver of sulfur or other such patina.  


Sunday, December 16, 2012

Tumble & Shine


Once I resolved the bails on this small series of simple pendants, it was time to fire and tumble them.  When silver clay is fired it does not come out looking shiny and metallic.  When I first tried metal clay I thought I was under-firing it because it kept coming out white.  Now I know that white is simply the fire-scale on the surface of the metal (below left).  It easily comes off with a brass brush, but leaves the silver sort of matte and in need of polishing.  A tumbler is a great way to polish up your pieces (not just metal clay) and it serves to help work-harden your pieces.  It also softens burrs that might be on your metal.  Tumblers range in price, I use the small inexpensive one above and can fit a number of pieces into it.  It's a simple tool, fill the barrel halfway with stainless steel shot (bought with the tumbler), a small amount of cleaning solution (see what your instructions recommend), place your pieces and fill with water just above the shot.  I run the tumbler for 2-3 hours depending on the degree of tumbling the pieces appear to need.  Below you can see the difference from the white fire-scale to the shine out of the tumbler.  A word of caution, soft materials such as pearls and turquoise may react badly with your cleaning solution, so know its compatibility and be sure precious metals are actually precious or the stainless steel shot may reveal more than a high shine!


Sunday, December 9, 2012

Hidden Bails in Metal Clay


For the largest pieces in this series, I decided I did not want the bail to become a decorative element.  It was important for these pieces to maintain their simplicity and that meant building hidden bails for them.  I rolled out my clay and decided an elongated oval would be the best shape and cut it to the length of the entire back.  I chose to wrap it around a straw and made sure it had been rubbed with olive oil to prevent the clay from sticking.  After cutting the oval, I slid my pin tool under one end and gently lifted the piece off my working mat.  I draped it over the straw and gave it a moment to set up.  I wet the back of my piece and placed pasted where the two ends of the bail would come into contact with the pendant.  I lifted the straw and placed the bail, gently pressing each end to secure it and cleaned up around its edges.  Once the piece began to dry enough so it would hold its form, I gently twisted the straw as I pulled it out.  I didn't want to wait until it was completely dry because I was concerned it would shrink too tight around the straw.  

Sunday, November 25, 2012

Coil Bails in Metal Clay


After exploring wire bails (discussed in last week's post) for the smallest pieces in this series, I thought I would work with coil bails for the mid-size ones.  With the intention of integrating the bails into the design of these pendants, I am looking at ways to hang them that go beyond drilling a hole and inserting a jump ring.  If you haven't rolled coils in metal clay, below are images of my two best tips.    Of course, remember to lube your working surface and any tools that will apply pressure to your clay so they will release and not tear.  I continue to find success with just simple Olive Oil.  On the left, I am using an acrylic block to roll the coils out after starting them with my fingers.  This method seems to keep the coils more even on their tiny, fragile scale and prevents your hands from wicking moisture out of them.  Second, keep them damp!  Spritz coils or  lightly brush with water to keep them flexible, they dry quickly and if you see stress cracks starting, I generally find it's time to start again.


In the images below, I have rolled out fresh clay coils and attached them to greenware (dried clay) pieces.  For coil bails, I roll the coils out one at a time and use them immediately due to their quickness to dry out.  Once I have the coil the length I am aiming for, I flatten one end with my finger.  I paint a small amount of paste where the coil will attach on the back  of my piece. Next, I slip a tool (such as a pin tool) under one end and slide along it to lift the coil with a little more control.  I place the flattened end on the paste and press firmly in place.  After gently flipping the piece, I dampen the coil with water on a brush so it does not crack as I bend it.  I lay a straw lubed with olive oil on top of the coil and paint paste where it will attach on the surface.  I then gently lift the coil around and press it to the front.  You might keep it simple and mimic the back design where it is flattened or you could spiral the tail in to be more decorative.  As I attach it, I go back in with a rubber shaper tool, I clean up the areas I attach as much as possible before it starts to dry.  I try not to move them until until they have set up a bit and then place them on a mug warmer to dry out.  Once the color changes to a dry looking white, I gently twist the straw while pulling it out.  Remember, as the clay dries it shrinks, so removing the straw as soon as possible will lessen the chance of it cracking your fragile, unfired coil.  The bail being built below is shown at the top of this post fired.


Sunday, November 18, 2012

Wire Bails with Metal Clay


I have been creating a series of smaller circle pendants, some domed and some flat.  They are delicate forms and I was determined to integrate the bail into their design, as opposed to simply drilling a hole and inserting a jump ring.  Their small size and domed form made both a coil or hidden bail difficult.  I then thought this would be a great time to explore incorporating fine silver wire into my fine silver metal clay.  I had worked with embedding fine silver wire into the clay, but not attaching it to the surface and thought this was the opportune time.

I planned out my design in string, taking into account the loop the chain would pass through and the area that would need to adhere flat to the back of the pendent.  I then used the string to measure and cut this short length of 18g round fine silver wire (fig. 1 below).  Once cut, I tightly spiraled one end and openly looped the other in a sort of fancy looking "S" shape (fig. 2 below).  To further transform the wire, I decided to hammer it flat.  I placed my "S" shape on a metal surface and hammered it flat in just a few hits leaving a wider version of the "S" (fig. 3 below).  Finally,   I needed to twist the bail so that the spiral would lay flat on the back of the form and the open loop would allow the chain to pass through.  I grabbed both ends of the "S" with flat nosed pliers.  Holding firm with the pliers clamped onto the tight spiral, I gently twisted the open loop about 45 degrees (fig. 4 below).  Keep in mind that the pliers should be smooth, if they have any sort of grip or "teeth" they will mark up your wire.  It can be cumbersome to wrap the wire in something to protect it, so I find that some duct tape wrapped around the teeth on the pliers is enough of a cushion to prevent this and can be removed/replaced as needed.

To attach the bail to the piece, I began by wetting the spot where I wanted it to adhere.  I then painted paste on the back of the wire and firmly pushed it down.  When the paste escaped through the spiral, I released and allowed it to set up for just a few minutes (below right image).  I then took a damp brush and smoothed out the paste, knowing it would be very difficult to sand this fragile area before firing.  The spiral serves as more than just decorative since it provides open spaces for the paste to cling to and fill in, strengthening the connection.  The back of the final fired form is above.  Visit my jewelry site to see other views and versions.


Sunday, November 11, 2012

Maker's Mark in Metal Clay


This series of small circular pendants has given me a number of different elements to explore that were simply not much of a notion with my more sculptural organic forms.  In addition to playing with resolving bails with these traditional forms, I began to consider stamping their quality to ensure they were not confused with a base metal clay.  I found a company that sold quality stamps for all metal clays and did custom tiny metal clay stamps, from signatures to logos to photos.  I used www.MetalClays.com and had a super positive experience.  They have great images and videos on their site if you want to really see their products in action before purchasing, with clear instructions on creating the logo stamp.  

As you can see above, I ordered a custom stamp with my logo and a Fine Silver (FS999) quality stamp.  The stamps arrived after I had begun this series, so I thought I would try to make a bunch of small medallion-like pieces to paste on the back of the already dried forms.  As you can see from the image above, they were considerably smaller than a water bottle cap, which is perfect for the back of the jewelry.  It took some experimenting to figure the correct amount of pressure and rocking motion to get a clean stamp, but eventually I got the hang of it.  I stamped my logo, lined up the quality mark and used a tight circle template to encase them.  Due to its small scale, attaching the wet pieces without smooshing the design became more time consuming than I wanted.  Since these pieces were domed, I had to attach the stamped medallions while they were wet since the forms themselves were already in the greenware stage.  In the future, I would save this method of making a separate stamped piece and attaching to the back for flat pieces where I can attach two stable dried forms.  On curved or other difficult surfaces, I would stamp right into it while building it.  Below you can see the logo image I sent them and the dried stamped form before firing.  Check out my Wire Bails post from last week for a good image of it fired.


Sunday, November 4, 2012

Transformed


Last week's post referenced Ernst Haeckel's Art Forms in Nature, which is an intriguing look at biological forms.  Haeckel asked the viewer to look more closely at fantastical biological forms that were often overlooked, there by transforming preconceived notions of what certain things ought to look like.  For this piece, I found myself drawn in by that very same idea of seeing something otherwise forgotten.  While out collecting pods for more pieces, I grabbed a couple of small mushrooms whose texture was irresistible.  As they dried, they curled in on themselves, forming their own sort of cocoon.  I continued using the metal clay slip-dipping method, but was met with very different results.  To begin with, mushrooms are very spongey.  Unlike the paper thin pods that quickly absorbed and then built up the metal clay layers, there seemed to be no end to the amount of metal clay slip the mushrooms would absorb.  Next, continuing to wet the mushrooms with paste began to smell a little like I was raising pigs in my studio.  I began with three mushrooms, but ended up with just one piece.  The first catastrophe occurred before firing as I tried to drill into the delicate form in order to create a channel for the chain, it split into pieces that were not worth repairing.  I was able to soak the mushroom in water and remove the majority of the paste in order to recycle the metal clay for future use.  As you can see below, two mushroom forms made it into the kiln, the smaller of the two with a fine silver wire running through it in order to build a bail after it was fired and avoid trying to drill my way into a second disaster.  After firing, and tumbling, I began trying to manipulate the wire and realized the smaller form was too soft and the spongey mushroom had not sintered properly.  I bent the form back and forth until it cracked and got a look inside of the incomplete layers.  The third piece in this series held up.  A little larger, with deeper textured grooves to hold the paste, this form seems to be the right balance of paste and organic matter.  The center is set with a marquise cut 4 mm green CZ, mimicking the oblong form.  The beautiful texture is further pronounced by a patina of alcohol inks in green and red, a subtle nod to the fall day this form was discovered.


Sunday, October 28, 2012

Pearl & Vine


For the piece seen above, Pearl & Vine, a wild cucumber pod was "slip-dipped" in the milk thin metal clay paste described in earlier posts.  This process is both slow and messy, but does produce delicately detailed results.  
The wild cucumber is a vining native annual that is in the cucumber family, but not actually edible.   It has some resemblance to the cultivated cucumber as it grows oblong on the vine, but the spiny fruits ripen to a brown color and burst to eject its seeds for next season.  Left behind to dry are complex layered pods.  These encapsulated forms have hidden chambers revealed through their lace-like paper thin layers, allowing light to pass through.  They are reminiscent of the sort of images found in Ernst Haeckel's Art Forms in Nature prints from the late 1800s (image below).  For this piece, fine silver wire was set into the pasted pod.  Once fired, green freshwater pearls were set on the wire, mimicking its color origins.  This distinct piece clings to the sterling silver neck ring, echoing its once wild ambitions.

Ernst Haeckel

Sunday, October 21, 2012

Paste On!


This week saw more experimenting with the pasting method I described last week. By keeping the paste the consistency of cream and continuing to focus on this notion of porcelain "slip-dipping", more possibilities arose. Below is an image of one of the lacey pods cut apart and individually dipped. As they dried on the mug warmer (also pictured below), I began reassembling them and kept the small nugget shaped piece in a measuring spoon to maintain its rounded form. Once it's form had been determined, I added a small 4mm CZ to create a focal point and filed two of the openings large enough to pass a neck chain through. When I fired this piece it was on a fiber blanket to support its form. The finished piece is a Fine Silver Pendant set with a CZ and given a patina using liver of sulfur. Before setting it on a sterling silver snake chain, the final addition was purple silver plated wire woven through the voids in a pattern following the path of least resistance.  You can check out the finished piece above.


Sunday, October 14, 2012

Pasting Organic Forms in Metal Clay


It's fall in New England, so all around me I am witnessing the natural world prepare for its long Winter's nap.  What I am most drawn to are these dry, lace-like pods that litter the ground.  They have burst and shriveled, after laying the seeds for next year.  I find it hard to resist collecting them, their complex cavities offer so much on such a small level.  

Dried Fall Pods

Building Up the Paste
Working with metal clay, pasting is often a one-dimensional endeavor.  You paint the metal paste on an object in order to fire it and be left with the side that was in contact with the texture, but nothing from the side you built up.  How could I capture the intricacies of this incredible little object?  They are so fragile that making a mold seemed futile and out of the question.  Having been inspired by the porcelain work of my good friend Erica Nickol, I thought why not dip it?  What if the metal clay paste was so thin it could saturate the pod and slowly build up in layers?  So I began experimenting with the silver clay paste and found that the consistency of half and half was just right.  Mixing a single gram of paste with just enough water for it to become a flowing liquid.  The piece had to be hung (over a bowl to capture and recycle drippings) and dry between each layer.  This is the sort of project best done on the side while each layer slowly builds up.  There will come a point where the layers are thick enough that the piece holds its form when saturated and that's the sign to paint on two or three layers of the regular thickness of paste and be done.  The piece below was set with a clear 4mm CZ before firing.  After being tumbled, I gave it a gray patina with liver of sulfur and wrapped it with silver plated colored wire as an accent  Firing the piece on a fiber blanket served as enough of a "pillow" to hold its form.  Check out the final piece above!


Sunday, October 7, 2012

A Little Bit of Her-story...

The Shift: Discovering Metal Clay...

I have worked with metal for as long as I can remember.  I took my first sculpture and welding class in college, which happened to be in the morning.  This meant there were many days I showed up to my afternoon lecture class covered in soot and looking a disaster.  Metal was big and it was strong and it was something to wrestle with.  I began combing the etching practices I was using in printmaking to create intricate details on the surface of my copper sculptures.

Years later, when an opportunity to teach sculpture arose, I was asked if I could also teach a small metals class in jewelry.  I thought "sure, it's just very small sculpture".  Needless to say, there was a bit of a learning curve when it came to scaling back with the torch.  There were many jewelry casualties that first year as I learned that very small metal melts very quickly!  Overall, my students found much success, one from that first year even going on to get her BFA in Jewelry and Metalsmithing.  Little did I realize it almost a decade ago, but opening up my practice to jewelry design would shift my perspective on sculptural forms.

Another major shift for me occurred last year when I took a metal clay workshop with Master Teacher Lis-el Crowley.  The Fine Silver piece I created (pictured above) sparked my interest with the endless possibilities of this contemporary material.  For those new to metal clay, you can find it in both fine and base metals.  Finely ground metal is mixed with organic binders in order to work with it in a clay-like state, it is then fired in a kiln to burn off the binder leaving only the metal.  I was so enamored with the possibilities of this material for my students (and myself), that I went on to earn my Level One Instructor Certification in Art Clay Silver and haven't put it down since.

Sunday, September 30, 2012

Welcome to the Studio


Welcome to Silver Magpie Studio.  In the last 15 years, my studio has made its home in a lot of different spaces.  Some had a ton of space, some had a ton of mice, some had a lot of noise, most were just plain cold, some were in cities, one was way out in the country, three times I found myself in converted old factories, and there was even one very creepy attic.  As I approach the second anniversary of what I hope to be my final studio move, I figure it is the best place to begin this blog - just a little glimpse into the space where I begin each piece.  A peaceful space that is open and warm with light that floods in from a wall of windows which overlook the natural environment that inspires many of my pieces.   Check back as I share what I'm working on each week in the studio and watch pieces evolve from their very beginnings.