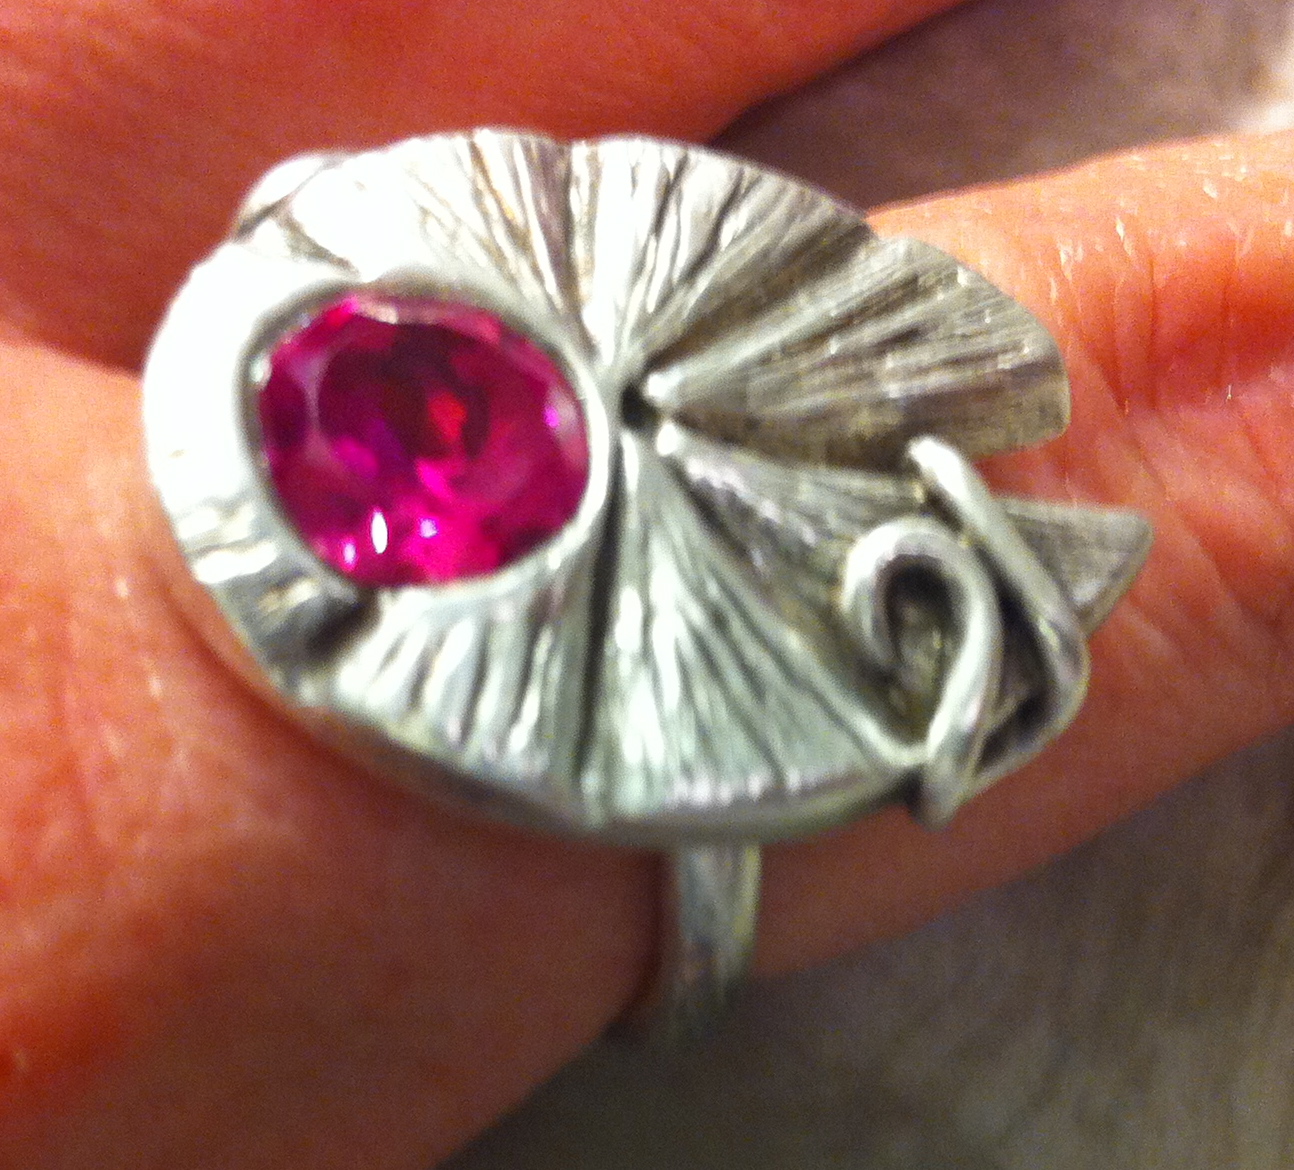
This week's challenge was to translate a carved design into the top of a ring. I was inspired by this bright pink 8mm CZ and couldn't resist the temptation to nestle it safely into a lily pad. The perfect pink floral accent to the top of this piece. I balled up my clay and squished it into a flat pancake the same height as the CZ. I poked a hole with a straw and sank the CZ in until the top of the clay surrounded it. I then cut out my initial shape of the lily pad and let it dry. Once bone dry, the clay is very easy to carve, especially at this thickness. I find that small diamond files are the best carving tools in this dry material. It has a similar feel to plaster carving. I began with my general design and deeper lines and then carved the more detailed texture, each time lightly scratching or "drawing" in my design before begining to file. The secret is no pressure. The tools are sharp and just need to be trusted to do their job. I added a coil to keep the eye moving around the piece and finished the ring with a liver of sulfur patina to bring out the richness of the texture.
Showing posts with label Botanical. Show all posts
Sunday, May 19, 2013
Carving in Metal Clay
Labels:
Art,
Art Clay Silver,
Botanical,
Coil Bails,
Jewelry,
lily pads,
Liver of Sulfur,
Metal Clay,
monet,
Organic,
Patina,
PMC,
Silver,
Silver Magpie Studio,
Stone Setting
Sunday, February 24, 2013
Whimsical Tree Mural
This week the studio went mobile as I traveled to do a very special mural for a very special little girl. Working with her parents, we developed a whimsical tree with floating pink leaves to adorn her walls. This sort of project is not nearly as intimidating as it may seem. Decal Murals are pretty popular today, but also pricey. The cost of paint for this project was under $25 and it was completed in one day. Below you can see the stages of the mural's development. You can see I started with a simple pencil sketch right on the wall, if you are not comfortable free-handing your image, project it on the wall and trace it.
Keep the image and the color simple. The tree trunk is done as a silhouette in brown, this was a huge time saver since I had only one day to complete this piece from start to finish. I am using latex wall paint for the large brown area and Martha Stewart Pearl Accents Craft Paint for the leaves (the pearl paint has a really lovely shine as it picks up the light). The larger leaves were done from stencils I cut from manilla folders and dry brushed multiple colors on at the same time. There was a plan for the larger leaves and then it became more intuitive as I played with where the smaller leaves would float around the closet. To fill in the rest (and save hours of time), I cut a medium and small leaf out of a sponge (just using scissors) and simply stamped them on the wall. The finishing touch can be seen in the image on the below right, as that special little girl got put to work and left her own marks among the leaves.
Labels:
Art,
Bedroom Design,
Botanical,
craft,
Martha Stewart Craft Paint,
Mural,
Nursery,
Silver Magpie Studio,
Sponge Paint,
Stamps,
Studio,
Trees,
Wall Mural
Sunday, November 4, 2012
Transformed
Last week's post referenced Ernst Haeckel's Art Forms in Nature, which is an intriguing look at biological forms. Haeckel asked the viewer to look more closely at fantastical biological forms that were often overlooked, there by transforming preconceived notions of what certain things ought to look like. For this piece, I found myself drawn in by that very same idea of seeing something otherwise forgotten. While out collecting pods for more pieces, I grabbed a couple of small mushrooms whose texture was irresistible. As they dried, they curled in on themselves, forming their own sort of cocoon. I continued using the metal clay slip-dipping method, but was met with very different results. To begin with, mushrooms are very spongey. Unlike the paper thin pods that quickly absorbed and then built up the metal clay layers, there seemed to be no end to the amount of metal clay slip the mushrooms would absorb. Next, continuing to wet the mushrooms with paste began to smell a little like I was raising pigs in my studio. I began with three mushrooms, but ended up with just one piece. The first catastrophe occurred before firing as I tried to drill into the delicate form in order to create a channel for the chain, it split into pieces that were not worth repairing. I was able to soak the mushroom in water and remove the majority of the paste in order to recycle the metal clay for future use. As you can see below, two mushroom forms made it into the kiln, the smaller of the two with a fine silver wire running through it in order to build a bail after it was fired and avoid trying to drill my way into a second disaster. After firing, and tumbling, I began trying to manipulate the wire and realized the smaller form was too soft and the spongey mushroom had not sintered properly. I bent the form back and forth until it cracked and got a look inside of the incomplete layers. The third piece in this series held up. A little larger, with deeper textured grooves to hold the paste, this form seems to be the right balance of paste and organic matter. The center is set with a marquise cut 4 mm green CZ, mimicking the oblong form. The beautiful texture is further pronounced by a patina of alcohol inks in green and red, a subtle nod to the fall day this form was discovered.
Labels:
Art Clay Silver,
Botanical,
Ernst Haeckel,
Metal Clay,
mushrooms,
paste,
PMC,
Silver Magpie Studio,
silver pendant,
sinter,
slip dip,
Studio
Sunday, October 28, 2012
Pearl & Vine
For the piece seen above, Pearl & Vine, a wild cucumber pod was "slip-dipped" in the milk thin metal clay paste described in earlier posts. This process is both slow and messy, but does produce delicately detailed results.
The wild cucumber is a vining native annual that is in the cucumber family, but not actually edible. It has some resemblance to the cultivated cucumber as it grows oblong on the vine, but the spiny fruits ripen to a brown color and burst to eject its seeds for next season. Left behind to dry are complex layered pods. These encapsulated forms have hidden chambers revealed through their lace-like paper thin layers, allowing light to pass through. They are reminiscent of the sort of images found in Ernst Haeckel's Art Forms in Nature prints from the late 1800s (image below). For this piece, fine silver wire was set into the pasted pod. Once fired, green freshwater pearls were set on the wire, mimicking its color origins. This distinct piece clings to the sterling silver neck ring, echoing its once wild ambitions.
![]() |
| Ernst Haeckel |
Labels:
Art Clay Silver,
Botanical,
Ernst Haeckel,
Jewelry,
Metal Clay,
Organic,
PMC,
Pods,
Silver Magpie Studio,
silver pendant,
Wild Cucumber Pods
Sunday, October 14, 2012
Pasting Organic Forms in Metal Clay
It's fall in New England, so all around me I am witnessing the natural world prepare for its long Winter's nap. What I am most drawn to are these dry, lace-like pods that litter the ground. They have burst and shriveled, after laying the seeds for next year. I find it hard to resist collecting them, their complex cavities offer so much on such a small level.
![]() |
| Dried Fall Pods |
![]() |
| Building Up the Paste |
Working with metal clay, pasting is often a one-dimensional endeavor. You paint the metal paste on an object in order to fire it and be left with the side that was in contact with the texture, but nothing from the side you built up. How could I capture the intricacies of this incredible little object? They are so fragile that making a mold seemed futile and out of the question. Having been inspired by the porcelain work of my good friend Erica Nickol, I thought why not dip it? What if the metal clay paste was so thin it could saturate the pod and slowly build up in layers? So I began experimenting with the silver clay paste and found that the consistency of half and half was just right. Mixing a single gram of paste with just enough water for it to become a flowing liquid. The piece had to be hung (over a bowl to capture and recycle drippings) and dry between each layer. This is the sort of project best done on the side while each layer slowly builds up. There will come a point where the layers are thick enough that the piece holds its form when saturated and that's the sign to paint on two or three layers of the regular thickness of paste and be done. The piece below was set with a clear 4mm CZ before firing. After being tumbled, I gave it a gray patina with liver of sulfur and wrapped it with silver plated colored wire as an accent Firing the piece on a fiber blanket served as enough of a "pillow" to hold its form. Check out the final piece above!
Labels:
Art,
Art Clay Silver,
Botanical,
Jewelry,
Metal Clay,
Organic,
PMC,
Pods,
Silver Magpie Studio
Subscribe to:
Posts (Atom)